Zucchini Dumplings: the Taste of Summer

Finally, it is summer time!  Summer in Michigan means lots of fresh local produces in farmer’s market.  I get so excited that I always automatically wake up earlier on Wednesday and Saturday morning, so that I can go to our local farmer’s market to see what good eats are available today. To me, summer is the best time of the year.  Yes, it is way better than the holiday season!

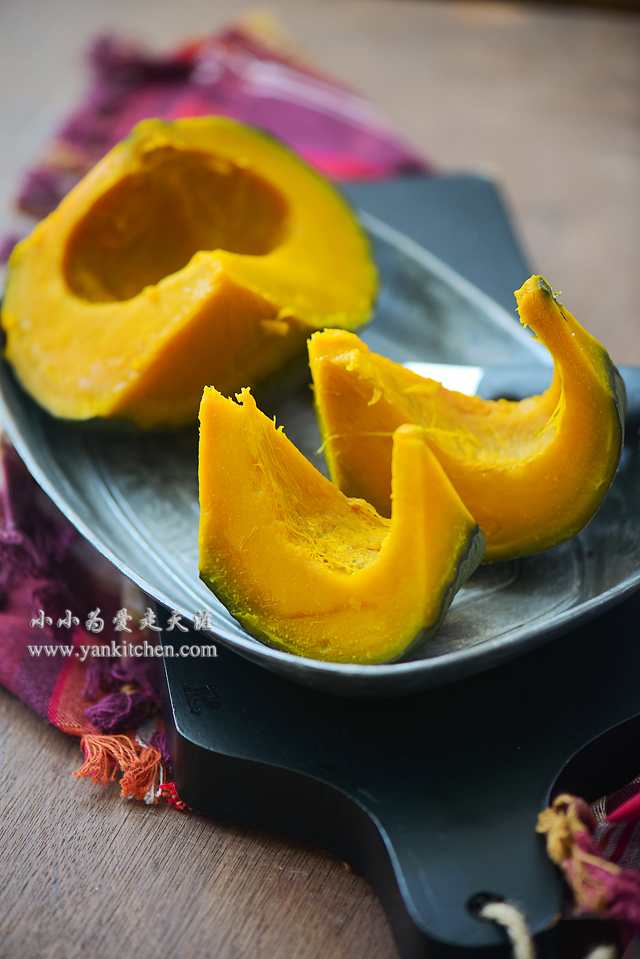
Among the produce I am so looking forward to is zucchini.  They are fresh, sweet, tender and refreshing.  There are many ways to cook with zucchini and each and every way is good.  I use them in stir-fries, soup, savory pancakes and dumplings.

Making dumplings is really a good use of zucchini.  But I don’t just chop it up and use it like that.  I dehydrate the zucchini first, so that the flavor is more intense, and zucchini won’t be mushy when cooked.  

For whole-wheat dumpling wraps:

3 cups bread flour
1 cup whole-wheat flour
1 1/4 cup water
1/2 teaspoon salt
1 teaspoon oil


For dumpling filling

1 1/2 pound ground pork
3 large zucchinis
1/4 teaspoon ground white pepper
2 rice cooking wine
2 to 3 tablespoons soy sauce
1/2 ground ginger
1 teaspoon oyster sauce
1 teaspoon sesame oil
salt to taste
1/4 to 1/2 cup water/ chicken stock

Directions

Rinse the zucchinis under running water.  Pat dry and slice them thinly with a mandoline slicer. Spread zucchini chips on one or several racks. Dehydrate them under the sun or in a food dehydrator until zucchinis are half way dry.  


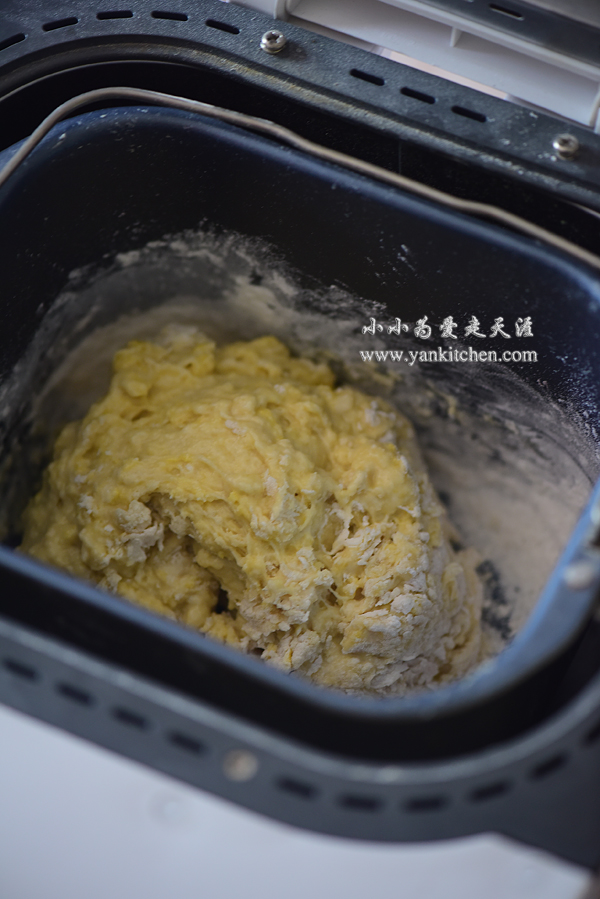
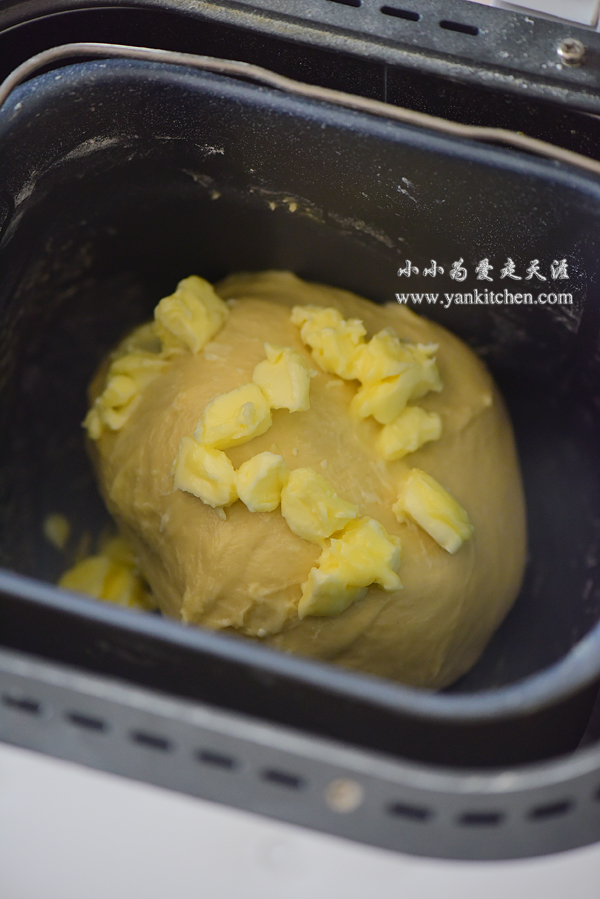
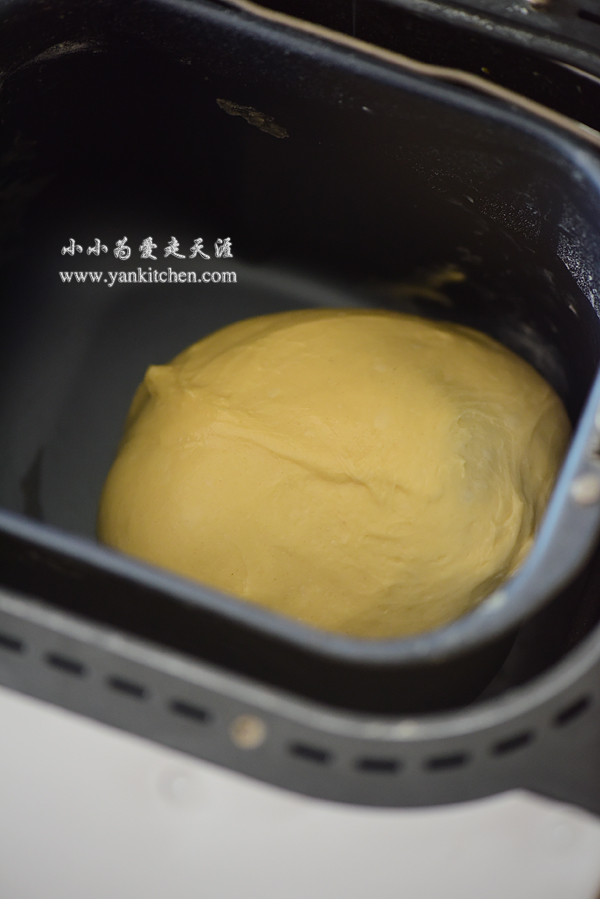
In a large bowl, add bread flour, whole wheat flour, oil and salt.  Whisk while gradually adding water to the bowl.  When flour starts to come together, knead with hands until smooth and elastic dough forms. 

Cover and let the dough rest for at least 30 minutes. 

In another large bowl, add ground pork, ground white pepper, sesame oil, soy sauce, oyster sauce, ground ginger and salt.  Whisk with a pair of chopsticks.  If you whisk hard enough, the ground pork, just like the flour, is going to come together and develop some kind of gluten.  Add water/ chicken broth, little by little; and keep whisking.

Add dehydrated zucchinis to a food processor.  

In seconds, zucchinis are evenly and finely chopped. I love my newly bought cuisinart 14 cups food processor.  It can be so helpful in the kitchen.


Add finely chopped zucchinis to the ground pork.

Whisk until the whole pork filling is well combined.  Add salt to taste.

Run the dough through stand mixer pasta roller several times.  


Set the thickness to 5, and run it one more time.

With a round cookie cutter, cut out round dumpling wraps. 


He is working on the dough and wraps; while I am working on dumplings. O(∩_∩)O~

Put 1 1/2 to 2 tablespoon pork filling in the center of one wrap.

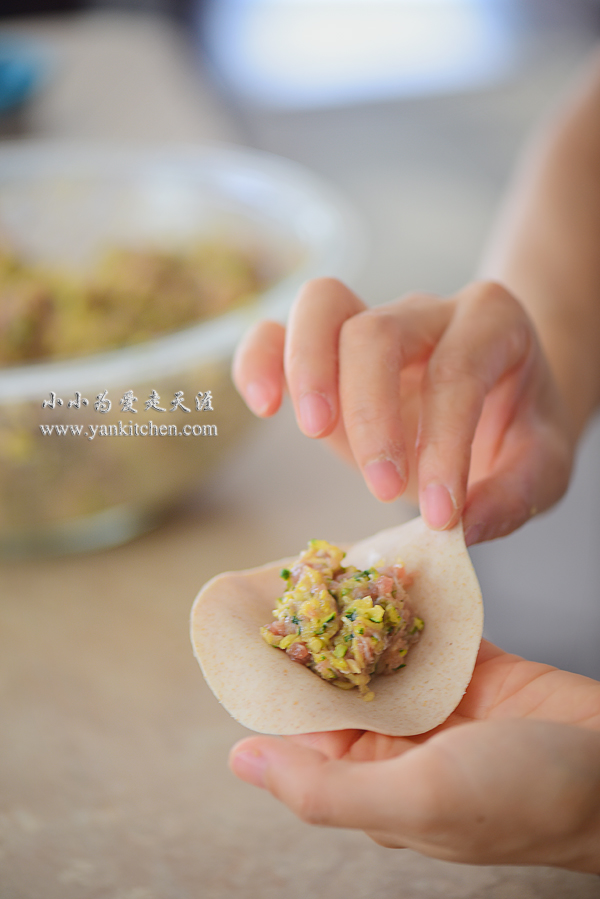
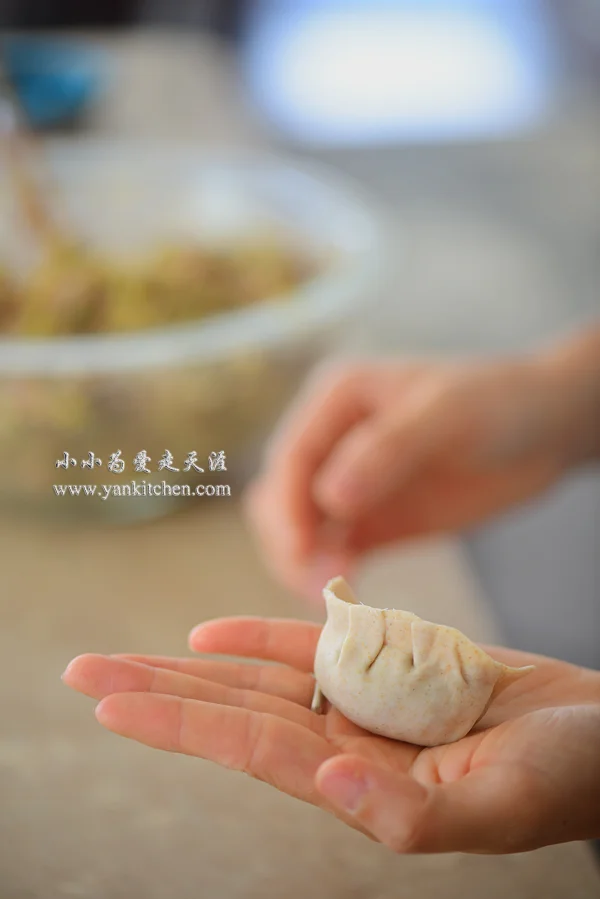
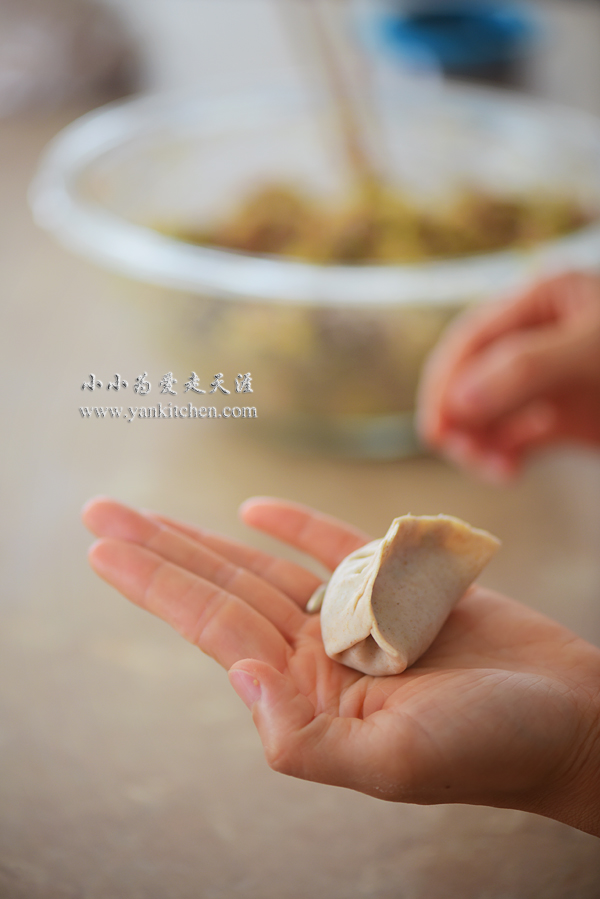
Fold the wrap over.  Press the sides together and make a couple creases on the each side.

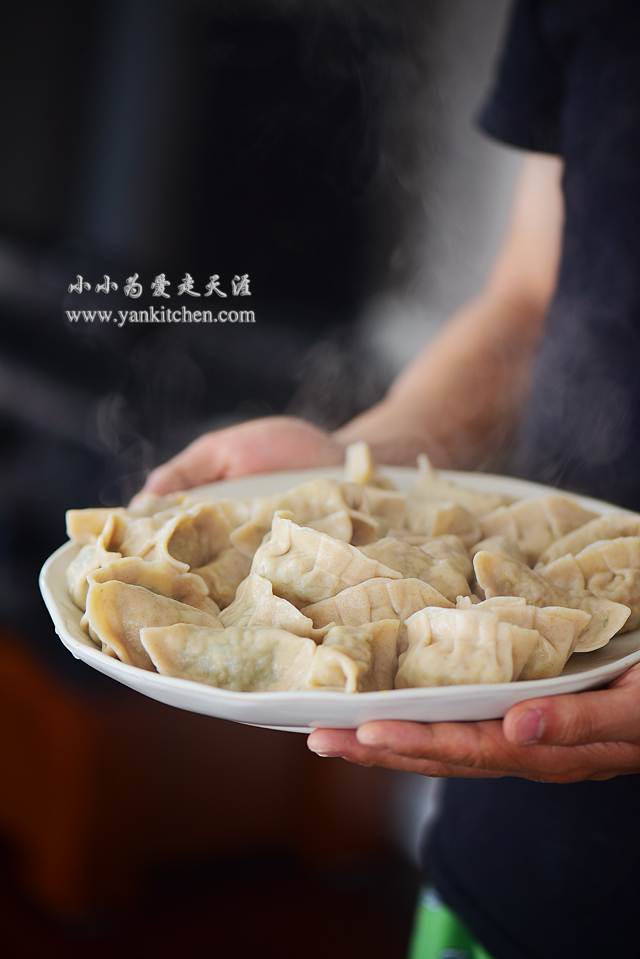
That is how you make a authentic Chinese dumpling.

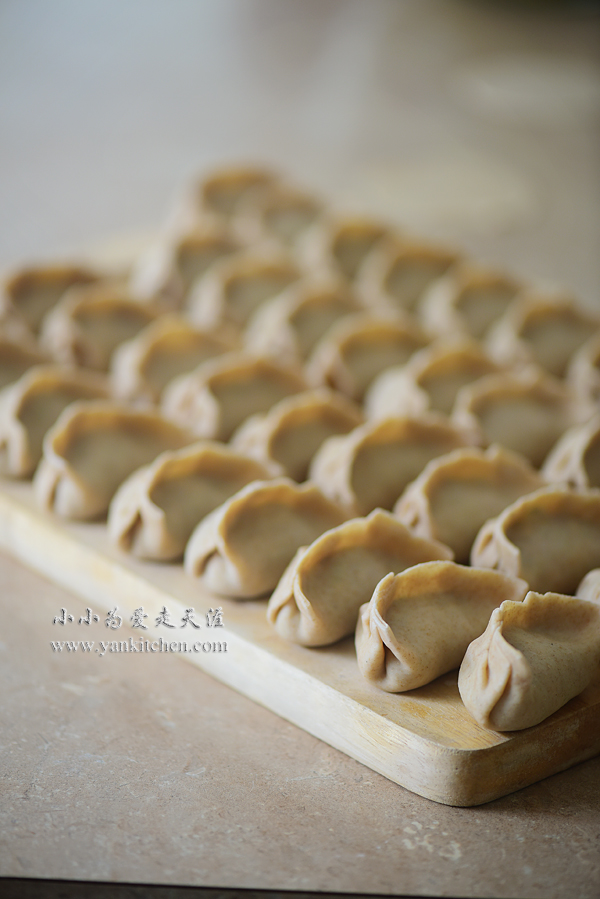
Line up the dumplings on a well-flour-dusted board.

I like to make dozens of dumplings at a time and freeze the extra and keep them in large Ziploc bags.  They are so much better than the dumplings you find in grocery store freezer.

Bring a large pot of water to boil.  Add dumplings.  When the water boils again, add one cup of cold water to the pot.  That should help to cook dumplings evenly inside and out. When the water boils again, add another cup of cold water to the pot.  Repeat it one more time and the dumplings should be ready. 

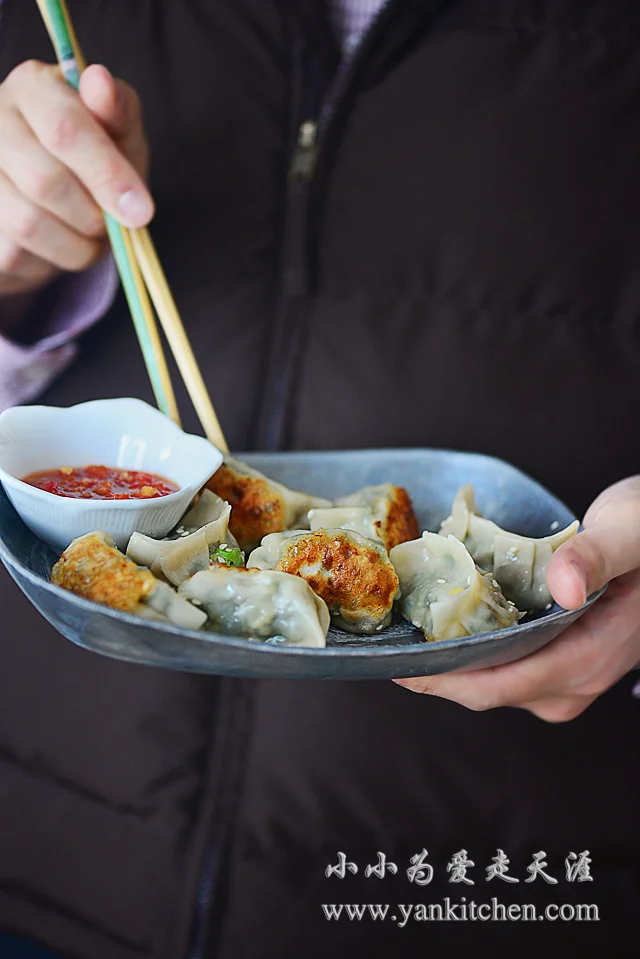
I like to serve my dumplings with garlic chili sauce.  This is the home version.  I post it before: http://www.yankitchen.com/blog/2k1o27b6fzy82wn0sphsah9oqd3hbo

Take a bite!

The dehydrated zucchini has more intense flavor.  I didn’t add any sugar to the filling, but it taste very sweet and refreshing, just like the way zucchini should be.  If you cook with zucchini before, you will know cooked zucchini are most likely to be mushy and watery.  But my version of zucchini dumplings are the very opposite of that.  It is sweet and tender, and well worthy of all the labor work. O(∩_∩)O~

Sweet Rice Balls with Brown Sugar Syrup

I have some left over squash and a small purple sweet potato.  I know I can do something to make them awesome.  So I turn them into sweet rice balls with brown sugar syrup.

Sweet rice, or glutinous rice, is very popular in Asian area.  It can be used in so many savory dishes, and it also can be found in many sweet desserts too.  I have been told that American people don’t like anything made from sweet rice or its flour.  Well, according to my prior experience, I agree it is very true.  

Squash sweet rice cake balls

1 small slice of cooked Kabocha squash
1 cup of sweet rice flour
1/2 teaspoon oil
1 tablespoon sugar
milk (if needed)

Purple sweet potato sweet rice cake balls

1 small cooked purple sweet potato
1 cup of sweet rice flour
1/2 teaspoon oil
1 tablespoon sugar
milk (if needed)

Sweet red bean paste

1 package of red beans(6 oz, about 170 g)
1/2 cup oil
1 cup of packed brown sugar (use more if you prefer sweeter taste)
water for cooking red beans

* The red bean paste is available in any Asian grocery store.  The listed ingredients above can make 5 to 6 times of what is needed in this recipe.  I like to make red bean paste in a large batch and freeze the extra, so that I can just take as much as I need from the freezer and thaw it.

Brown sugar syrup

2/3 cup packed brown sugar
2 to 3 tablespoon water
2/3 cup soy bean flour


Directions

I love to cook with Kabocha squash.  It is sweeter and has better texture than other squashes. 

Peel the cooked Kabocha squash and purple sweet potato.  Use a fork to smash them.

In two separate bowls, add smashed squash and sweet potato, sweet rice flour, sugar, oil and milk.  Knead until they form two sweet rice doughs. 

For homemade version red bean paste, I soak the red beans in water overnight.  Cook them with enough water over medium low heat until beans get soft. Use a blender to blend the beans into fine smooth bean paste.  

Heat a nonstick pan over medium high heat.  Add red bean paste. You will have to keep stirring to prevent the bean paste sticking to the bottom of the pan.  Add oil and sugar in three batches.  Stir and wait until the red bean paste absorbs the sugar and oil before adding more.

Cook until the red bean paste feels firm to stir. Remove from heat and let it cool down. The whole process might take between 15 to 25 minutes.

I make one bowl of red bean paste.  I will divide and wrap up the extra and store it in freeze for later use. 

If you simply don’t want to go through all the trouble to make it from scratch, just pick up a couple bags of red bean paste in Asian grocery store.  They can come in handy when making many Asian desserts. 

Divide the sweet rice doughs into cherry size pieces and roll into small balls.  

Do the same to the red bean paste, just in smaller size.

With your thumb, push down each sweet rice cake balls, wrap in red bean paste and roll into a round smooth sweet rice cake ball again.  

Now it is time to prepare brown sugar syrup.

In a small pot, add both brown sugar and water.  Cook over medium heat until water evaporates and the syrup begins to bubble. Remove from heat and set aside. 

Bring a large pot of water to boil.  Add sweet rice cake balls.  Cook until they float. 

In a bowl, add 2/3 cup soy bean flour.

Add cooked sweet rice cake balls and shake the bowl so that they can be evenly coated with soy bean flour. 

Top with brown syrup and a pinch of white sesame.  It is time to enjoy! 

The brown sugar syrup adds ton of wonder flavor to these tiny sweet rice cake balls.

This one is made of squash.

Here is a purple sweet potato rice cake ball. 

Sticky Buns

I love cinnamon pecan bread and brioche bread.  So I combine both of them into this perfect sticky buns recipe.  It is so much better than the tough chewy sticky buns bought from stores. I like to pair it with a cup of freshly brewed black coffee. And that is my idea of perfect afternoon tea. O(∩_∩)O~

You also need to know the calorie is sky high for this bread before indulging in.  Well, that seems to be true for most tasty comfort food. Although I am not the person who counts calories in every single meal, I know this is guilty pleasure will cost me extra hours on treadmill.  It is well worthy. 

Brioche and caramel make everything better! 

Brioche bread ingredients

320 g bread flour
2 tablespoons honey
40 g butter, softened and diced
2 large eggs
130 g whole milk
40 g sugar
1 1/2 teaspoon yeast
1/8 teaspoon salt
brown sugar
ground cinnamon

Goo/ pecan caramel topping

3/4 cup packed brown sugar
1 tablespoon water
3/4 cup heavy cream
1/4 cup butter
1 cup pecan

Directions

Heat the milk in microwave for 30 seconds; add the milk to bread machine container; dissolve yeast into the warm milk; and let it sit for 5 minutes.

Add eggs, flour, sugar, salt and honey. 

Start dough cycle.  

The dough is still rough.

When the first kneading cycle is done, the dough becomes smooth and elastic.

My bread machine will knead the dough for 20 minutes and proof for an hour.  When kneading is done, abort the cycle; add diced butter; and start the dough cycle again. It will knead for another 20 minutes. 

It should be able to get the dough past window panel test now.


When the bread machine kneads and proofs the bread, we can prepare the goo/ pecan caramel topping.

Toast pecan in a preheated 350F oven for 8 to 10 minutes; remove from oven and let them cool completely.

Chop them up.

In a medium sauce pan, add brown sugar and water.  Heat the pan over medium-high heat until the mixture bubbles.  Stir from time to time to prevent burning at the bottom. 

Gradually add heavy cream while whisking.  The mixture may splatter.  You have to be extra careful not to burn yourself.  

Add butter and cook for another couple minutes.  Remove from heat and allow the caramel sauce to cool down. 

The dough is perfect from bread machine.


When the dough is doubled in size, transfer it to a well dusted wooden board.  Gently press down and knead for a minutes; cover and let it sit for 10 minutes. 

Roll it out into 1/4 inch thickness; sprinkle with brown sugar and cinnamon; and then roll it up from one end into a log. 

Cut into 2/3 inch pieces.

Spray a 12 inch cast iron skillet with oil spray.  Add caramel sauce that has been cooled down.  Sprinkle chopped pecan on top. 

Add rolled dough pieces.

Cover and proof for another 25 to 35 minutes.  

Preheat oven to 375F/190C.

Bake the bread for 22 to 28 minutes.

After the bread is done, cool the bread in cast iron skilled for 5 minutes.  And then flip over.

That is how you bake a batch of gorgeous sticky buns at home!

The brioche bread has this rich, eggy and sweet and soft texture which I love so much. 

Coffee and sticky buns, it is so irresistible! 

Spicy Fava Beans

中文:辣拌蚕豆

Fava beans don’t seem to be popular in America.  My local grocery stores don’t sell them at all.  I bought some from a Mexico grocery store last time I went to Westland area. 

When cooked, they taste a lot like lima beans, with a mild nutty flavor and smooth texture. There were no fava beans where I grew up.  But they are grown everywhere in my husband’s hometown.  It is a widely popular ingredient in Sichuan local cuisine.  So he taught me how to cook them.

How cute they are!  

Ingredients:

1/2 pound fava beans
3 tablespoon chili sauce (available in any Asian grocery store)
1 tablespoon soy sauce
1 to 1 1/2 teaspoon sugar
1/4 teaspoon sesame oil
chopped green onion
chopped cilantro
salt and freshly ground pepper to taste
water

Directions:

Bring a medium pot of water to boil.  Add fava beans and cook for 8 to 10 minutes.

 Drain the beans. 

In a large glass bowl, mix well together cooked fava beans, chili sauce, soy sauce, sugar, sesame oil, salt, green onion and cilantro.

Cover and let it sit at least 2 hours.  The longer it sits, the better all flavors combine better.  

Grilled Burger

One of the reasons we love summer is that we love grilling! We grill all kinds of stuff.  Chicken wings, kebabs, steak, fish, you name it.  We haven’t grilled burgers before.  So we had our first during the past weekend.

I make the beef patties from scratch because I always prefer grind meat needed for cooking at home. 

Beef patties ingredients

1 pound ground beef
1 egg
1 small onion, finely chopped
1/4 cup bread crumbs
freshly ground black pepper
1/4 teaspoon sugar
1/2 teaspoon paprika
a pinch of garlic powder
salt to taste


Burger ingredients

4 burger buns
8 slices of bacon
cheese (I use bacon cheese from trader joe’s which is pretty awesome.)
thinly sliced onion
lettuce
mayonnaise


Directions

I bought a big package of chuckeye.  It is about 4 pounds.  I grind it all and save the rest in a couple Ziploc bags and freeze them for later use. 

Cut the chuckeye beef into small pieces and run through a meat grinder.  

I use a heavy duty meat grinder like this one: 


In a large bowl, add ground beef, egg, chopped onion, bread crumbs, black pepper, sugar, paprika, garlic powder and salt.  

Mix with hands just until everything combines and mixes evenly.

Divide the beef into four parts.  Make each part into a big ball with hands and then pat them down into beef patties.

With a thumb, make a dent in the center of each patty so that the whole patty will grill evenly on the grill.

Preheat the grill to 450F/232°C.  Wish a cloth brush, brush some oil to the griddle.

Grill the patties for 2 minutes. Someone decides to switch to hot dog.  So we grill three patties instead of four. 

2 minutes later

Flip them over.  Well, it looks like someone needs more practice. 

Top the patties with bacon cheese and grill for another 2 minutes.

Another 2 minutes later, the cheese melts.  It smells and looks so good.

Transfer the patties to the other end of the grill where temperature is much lower. Let them sit for a couple minutes.

Heat the buns on grill.

They just get more beautiful, don’t they?  The bacon cheese from Trader Joe’s is one of my favorite cheeses.  It goes well with sandwiches, salad or wine. 

With a spatula, spread the mayonnaise to the bread buns, top with a beef patty, bacon, onion and lettuce.  

Ok, now the burgers are done.  Time to enjoy them!

Feels pretty good to eat a burger you make from scratch 。。。

Take a big bite. 

It is really tender and juice.  The bacon cheese adds ton of great flavor to the burger.  And it is priceless to enjoy a summer evening in the yard with your loved ones. O(∩_∩)O~