Lucky’s Steakhouse in Bay City, MI

The Lucky’s Steakhouse in Bay City is almost our go to place now.  Although we don’t live in Bay City, that doesn’t stop us dining there from time to time.

The following picture is from internet.

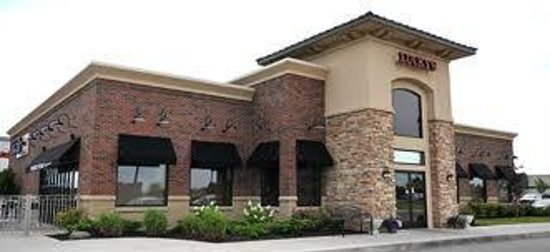
The interior décor is just so so.  But the service is always good.  Sometimes it can get very crowded.  The longest waiting record for us is over an hour.  That is pretty long waiting time for such a small town as Bay City.

Garlic bread for every table.  Well, not my favorite. 

I ordered a combo appetizer platter.

DSC_5393 2 copy.jpg

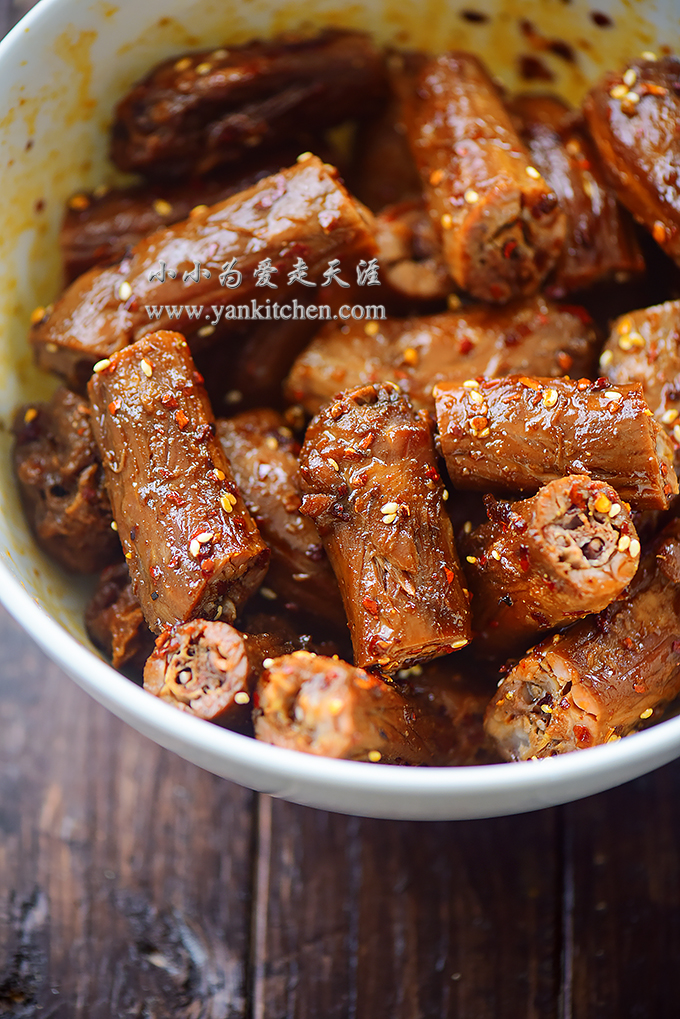
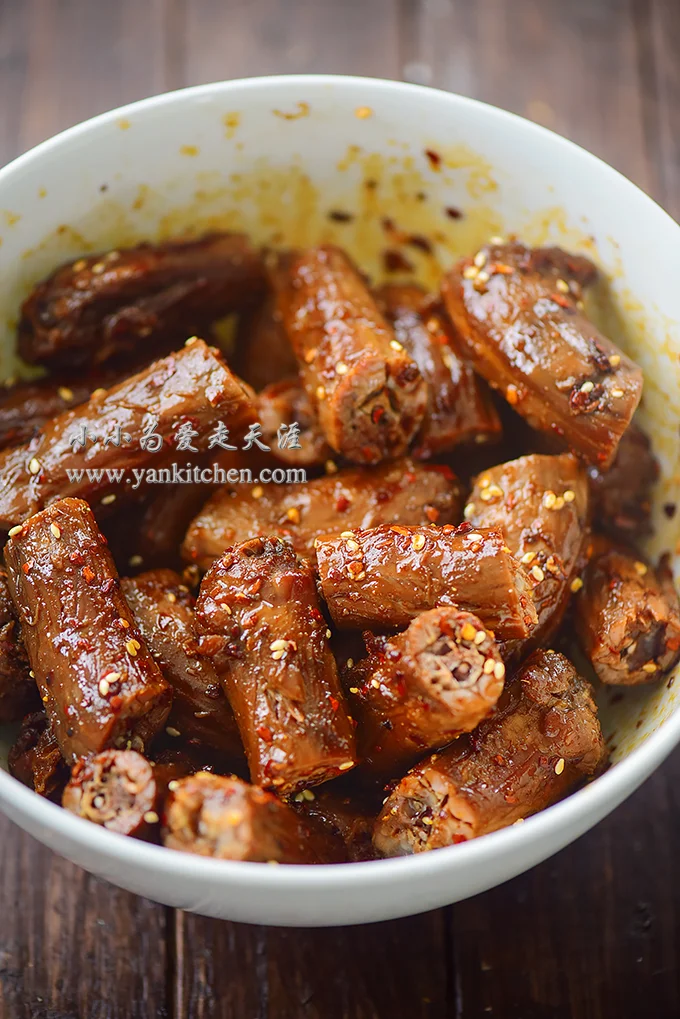
The ribs were great, tender and juicy.  The onion rings were hot and crunchy.

Our waiter was very considerate.  He brought extra plate for each dish so that my husband and I can share the food.

The potato fries were a really nice surprise.  Loved very bite until it was all gone!

DSC_5389 2 copy.jpg

House salad

DSC_5361 2 copy.jpg

My husband ordered Big Ribeye which is a huge 22 oz. prime cut of beef.  He asked for medium rare.

DSC_5393 2 copy.jpg

Now you see the reason why we like this steakhouse.  The steak is always cooked perfectly!

DSC_5414 2 copy.jpg

Hot and Spicy Duck Necks

If you are a hard core fan of Bizarre Food like me, you would probably have already heard or tried duck necks before.  They are a true delicacy and widely popular in China and maybe some other Asian countries too.

Because ducks constantly move their necks around, the meat from this part is lean and tender.  it is one of my favorites too.

DSC_4497 2 copy.jpg

Ingredients for braising duck necks

3 to 4 pounds duck necks
1 pot of “old soy sauce” *
1 clove of garlic
2 bay leaves
4 cloves
2 star anises
3 to 4 pieces of dried rhizome/ dried ginger slices
1/4 cup soy sauce
1 to 2 tablespoon dark soy sauce
2 to 3 tablespoons sugar
1/4 cup rice cooking wine
1 small piece of ginger root, crushed
1 teaspoon Sichuan peppercorns
1 handful dried chili peppers
1/2 teaspoon five spice powder
1/2 small cinnamon stick
1 teaspoon oyster sauce
1black cardamom pot
salt to taste
water for braising

(* An pot of “old soy sauce” is also called “old sauce”. It is the remaining braising sauce being boiled, filtered, covered tightly and kept in freezer.  Just like the “old dough” in pastry, the “old soy sauce” adds deeper, richer and better flavor to the braised meat.  A really good pot of “old soy sauce” may last years.)


seasonings

2 to 3 tablespoon chili oil sauce
2 tablespoon soy sauce
2 cloves of garlic, minced
1 tablespoon Sichuan peppercorn oil
1 teaspoon Sichuan peppercorns, toasted and ground
1 teaspoon sugar
1/4 teaspoon sesame oil
salt to taste

Directions:

The chili oil sauce is available in almost every Asian grocery store.  But I like to make my own version of chili oil sauce.

DSC_4771 2 copy.jpg

Remove any connective tissues on duck necks and rinse well under cold running water.

Blanch in boiling water for 5 to 8 minutes.  Drain well.

Put all spices needed except ginger for braising in a coffee filter paper.  If one is not big enough, use two pieces.

DSC_4336 2 copy.jpg

Tight it up

DSC_4342 2 copy.jpg

In a cast iron pot, add “old soy sauce”, spice bag, ginger, soy sauce, dark soy sauce, rice cooking wine, oyster sauce, salt and water.

Heat the cast iron pot over high heat until it boils.  Add duck necks.  Cover with lid and reduce the heat to simmer for about 60 minutes. If you like it more tender, extend the simmering time a bit longer.

DSC_4356 2 copy.jpg

Transfer the duck necks to a plate.  Cool down to room temperature.  Cover with plastic wrap and refrigerate for at least 2 hours.

DSC_4383 2 copy.jpg

With a sharp clever, chop the duck necks into 1 and 1/2 to 2 inches pieces.  Add chili oil sauce, soy sauce, minced garlic, Sichuan peppercorn oil, toasted and crushed Sichuan peppercorns, sugar, sesame oil and salt.  Mix well.

DSC_4482 2 copy.jpg
DSC_4458 3 copy.jpg

You can serve it now.  But the longer it sits, the better the flavor gets!  I usually make the dish ahead of time and let it sit for a couple hours before serving.

DSC_4511 2 copy.jpg

It goes so well with Michigan local beer!

DSC_4706 3 copy.jpg

Chocolate Crepe Cake

I have been making several crepe cakes.  The most popular and tastiest one in my option is chocolate crepe cake.

The slight bitterness from dark chocolate adds more flavor and richness to the cake.  I am not a big fan of whipped cream.  Normally I have to get rid of the whipped cream icing when I eat cakes.  Whenever I order a sundae, I skip the whipped cream topping too.  But I enjoy every single bit this chocolate crepe cake.  Yes, it is that good! O(∩_∩)O~

DSC_0483 2 copy.jpg

Ingredients:

1 cup all purpose flour
1 tablespoon coco powder
1 teaspoon instant coffee
1 cup whole milk
1 large egg
2 teaspoons melted butter
1/2 teaspoon vanilla exact  (optional)
1/4 teaspoon salt
fresh strawberries for garnish
1 to 2 tablespoons coco powder for garish

Whipped cream filling:

1 1/2 to 2 cups of heavy cream
1/2 to 2/3 cups sugar
1/4 to 1/3 cup dark chocolate
1 to 2 tablespoons coco powder

Directions:

In a large glass cup or bowl, add flour, salt and coco powder.  And then add egg, melted butter, vanilla extract and milk.  Blend with a hand blender until the batter is smooth.  If you don’t have a hand blender, a regular blender will work just fine.

Heat one or two mini cast iron skillets over medium low heat.

My skillets measure 6.5 in diameter on the bottom.  I think it is the perfect size for a small crepe cake.

Spray them with a little bit vegetable oil and then wipe with paper towel.

Add 1 to 2 teaspoons batter.  With a crepe spreader, spread it quickly and evenly.

I use two skillets so that I can cut the preparation time in half.  And the crepes size will be uniform.

I make 28 crepes which means the crepe cake has 28 layers O(∩_∩)O~

Allow the crepes cool down to room temperature.

Meanwhile, I prepare whipped cream filling.

Add chocolate to a heat proof bowl.  Microwave on high for 25 to 45 seconds or until chocolate starts to melt.  Stir in instant coffee.  Allow it to cool down a little bit.

With a hand mixer, beat the heavy cream in a medium bowl just until it begins to hold it shape.  Gradually add the sugar in between.

Fold in chocolate with a spatula.

Refrigerate for at least 2 hours.

Place one crepe in the center of a cake stand.  Add about 2 tablespoons whipped cream.  Spread it out evenly with an icing spatula

Repeat the process until all the crepes are done.

Sprinkle the top with coco powder.  Top with strawberries.

Refrigerate for at least 3 to 4 hours before serving.

Time to enjoy!

Although the crepes and whipped cream are in the same color, you can still see the layers. O(∩_∩)O~

Want to take a bite? O(∩_∩)O~

Matcha Crepe Cake

DSC_3036 2 copy.jpg

The very first time I tried crepe cake was in Toronto’s st Lawrence market.  I tried so many delicious things all at the same time that I forgot how the cake taste like.  After I came back, I begin to make my own version of crepe cake.  It is not hard or intimidating at all, but you surely need to be very patient with it.  

With two mini cast iron skillet and a custom made crepe spread from my husband, I present you, tad dah, a matcha crepe cake! O(∩_∩)O~


Ingredients:

1 cup all purpose flour
1 tablespoon matcha powder(or adjust the amount according to your own preference)
1 cup whole milk
1 large egg
2 teaspoons melted butter
1/2 teaspoon vanilla exact  (optional)
1/4 teaspoon salt
fresh strawberries for garnish
1 to 2 tablespoons matcha powder for garish

Whipped cream filling:

1 1/2 to 2 cups of heavy cream
1/2 to 2/3 cups sugar
1 teaspoon gelatin powder
2 to 3 tablespoons water


Directions:

In a large glass cup or bowl, add flour, salt and matcha powder.

Add egg, melted butter, vanilla extract and milk.  Blend with a hand blender until the batter is smooth.  If you don’t have a hand blender, a regular blender will work just fine.

Heat one or two mini cast iron skillet over medium low heat, spray them with a little bit vegetable oil and then wipe with paper towel.

My skillets measure 6.5 in diameter.  I think it is the perfect size for a small crepe cake.

Add 1 to 2 teaspoons batter.  With a crepe spreader, spread it quickly and evenly.

I use two skillets so that I can cut the preparation time in half.  And the crepes size will be uniform.

DSC_2934 2 copy.jpg

See how beautiful they are?  That is the reason I love cast iron pans!

I make 29 crepes which means the crepe cake has 29 layers O(∩_∩)O~

DSC_2942 2 copy.jpg

Allow the crepes cool down to room temperature.

Meanwhile, I prepare whipped cream filling.

Sprinkle the gelatin powder over water in a bowl.  Let it sit for a couple minutes and then microwave it for 20 to 30 seconds or until it completely melts.  Cool until it is no longer too hot to touch. 

With a hand mixer, beat the heavy cream in a medium bowl just until it begins to hold it shape.  Gradually add the sugar in between.

Add the gelatin solution to the whipped cream.  Whisk or fold until well combined.  Refrigerate for at least 2 hours.

DSC_2894 2 copy.jpg

Place one crepe in the center of a cake stand.  Add about 2 tablespoons whipped cream.  Spread it out evenly with an icing spatula.  You can add dice strawberries with whipped cream if you like.

Repeat the process until all the crepes are done

Sprinkle the top with matcha powder.  Top with sliced strawberries.

Refrigerate for at least 3 to 4 hours before serving.

Matcha and strawberries make a great pair, not only in colors but also in flavors too! O(∩_∩)O~

DSC_3036 2 copy.jpg

 Time to enjoy!

Rice and Chinese cured pork belly

DSC_1884 2 copy.jpg

There is a winter tradition in my hometown that every family is going to make cured pork and pork sausages.  It is such a big deal that the all family members are recruited to help around.  From planning, ingredients shopping, chopping, dicing, mixing to stuffing, it is a traditional family activity and celebration. 

Although every family has its own secret ingredients when making cured pork, they all taste very good.  The pork develop deeper and richer pork flavor after marinating and curing over time.  If you have no idea what they taste like, just imagine the Spanish prosciutto with a touch of rice wine.  

Most people don’t do that from scratch any more.  Whenever they crave for cured pork or pork sausage, all they need to do is to make a quick trip to nearest market where you can find all the ingredients and people to make them at a very affordable price.

Michigan has long cold winter, and it is perfect for making cured pork.

I love to make cured pork with pork belly.

You should be able to find cured pork in almost any Asian grocery store. 

Ingredients

1 cup medium grain rice
water needed to cook the rice according to the instructions on rice package
1 piece of cured pork belly (weighs between 1/2 to 1 pound)
4 to 6 fresh shitake mushrooms (you can use the rehydrated dry shitake mushrooms when the fresh ones are not available)
4 to 6 baby bok choy (I don’t have any left in refrigerator, so I use spinach instead)

For the sauce:

2 to 3 tablespoons soy sauce
1 to 2 tablespoon dark soy sauce
1/2 to 1 tablespoon sugar
1/2 to 1 tablespoon oyster sauce
1/2 teaspoon sesame oil

Directions:

The most authentic ones are cooked in Chinese clay pots.  I broke mine years ago.  So I use cast iron pot to cook it.  The result is fantastic too!

In a 3 quart Le Creusetcast iron Dutch oven, add rice and water.  Heat over high heat until it boils.

Rinse the cured pork belly under running cold water.  Pat dry with paper towel.  With a sharp knife, slice it.

Clean the shitake mushroom under running water or with a damp paper towel.  Cut each mushroom into 4 to 5 pieces. 

When water in cast iron pot start to reduce and you can see holes appearing on top, add sliced cured pork and shitake mushrooms.

Cover it up and reduce the heat to simmer for 8 to 10 minutes.

DSC_1795 2 copy.jpg

Turn off the heat but don’t rush to life the lid.  Allow it to rest for another 10 minutes.

Meanwhile, rinse and drain well the baby bok choy.  Blanch in boiling water for 5 to 10 seconds and then immerse in icy cold water for 10 seconds.  Drain well.

The rice is ready

DSC_1809 2 copy.jpg

The cured pork belly is semi transparent.  The rice absorbs the rich meaty nutty flavor from pork and shitake mushrooms.

DSC_1844 2 copy.jpg

Mix soy sauce, dark soy sauce, sugar, oyster sauce and sesame oil in a small bowl.

Pour over the rice

Add baby bok choy/ spinach.

Mix with a wooden spoon.

DSC_1923 2 copy.jpg

Bon Appetit!O(∩_∩)O~

DSC_1917 2 copy.jpg