Cranberry Bagels

中文: 蔓越莓贝果

What I love about bagels is that they are soft and chewy at the same time.  Cranberry bagel is one of my favorite flavors.  I wrote this recipe a few years ago and it has been getting good reviews.  It is getting improved over the years. I also retake step by step photos when I am making them.

Ingredients:

3 1/2 cups bread flour (500g)
1 1/4 to 1 1/3 cups water
2 teaspoons yeast
5 tablespoons sugar (use more if you have sweet tooth)
1 tablespoon melted butter
1 teaspoon salt
1 cup of dried cranberry  (or raisins, dried blueberries, mango or any dried fruits of your choice)

For boiling the bagels:

1/2 gallon water
2 tablespoons honey
1 tablespoon baking soda
1 teaspoon salt

Direction:

Microwave the water on high for 30 to 50 seconds.  Add the water, along with 2 tablespoons of sugar and 1 tablespoon flour to the bread machine .  Stir them together.  Sprinkle yeast on top.  Let it sit for 5 to 8 minutes.

Add the remaining ingredients and start dough process. 

In five minutes, everything starts to come together.

The bread machine kneads for another 20 minutes.  The dough is very smooth and elastic now.

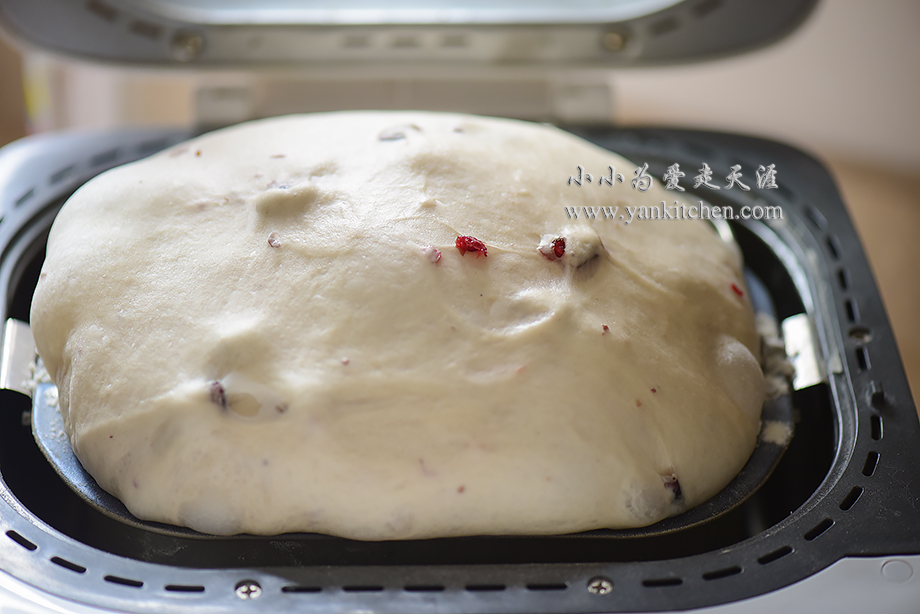
Wait until the dough doubles in size.

Transfer the dough to a well dusted wooden board.  Knead gently to get rid of big air bubbles.  Cover with plastic wrap and let it rest for 10 minutes.

Divide the dough into 16 pieces.  If you prefer bigger bagels, divide it into 8 to 10 pieces.

With a small rolling pin, roll each one flat.

Roll up from one end.

Tightly seal the seam.

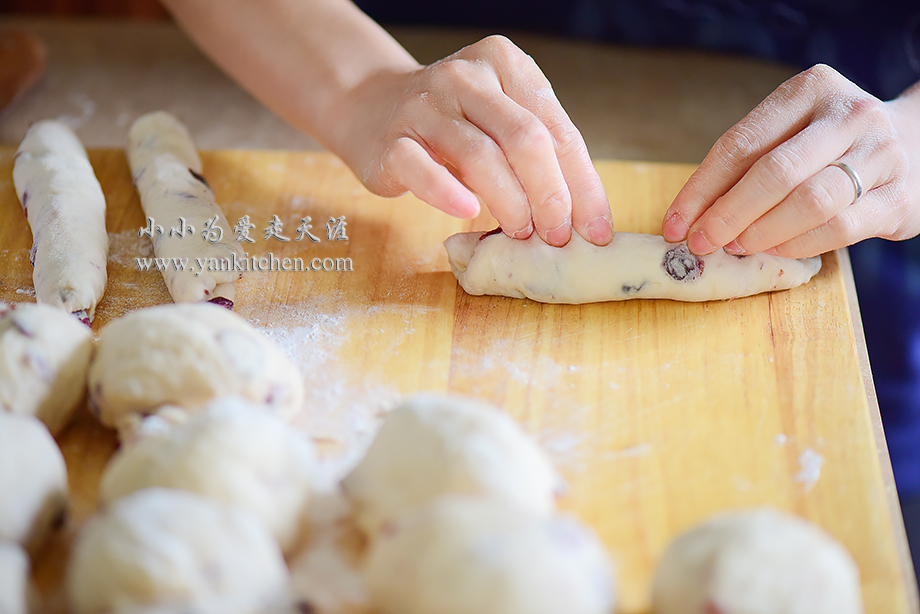
Put two ends together and roll into a circle.

Lay the bagel dough pieces on the cookie pan lined with silicone baking mat.

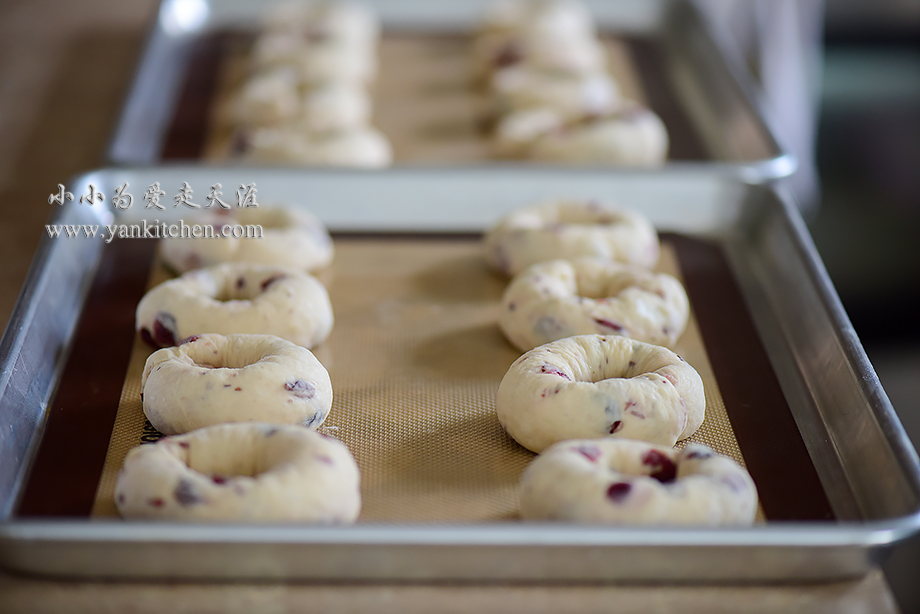
Cover with greased plastic again.  Proof in the refrigerator overnight; longer proofing time at low temperature gives them finer texture.  If you don’t want to wait, just proof them at the room temperature for another 30 to 40 minutes.

Preheat the oven to425F/220 C

In a large pan, add water, honey, salt and baking powder.  Heat over high heat until the water boils.  Reduce the heat to simmer.  Add bagels.  Boil each side for 30 to 60 seconds depending on their sizes.

Drain well and put them back to the baking pan with silicone mat.

Bake in the oven for 16 to 20 minutes or until the bagels are golden brown

Now you have a batch of cranberry bagels freshly out of the oven!

I prefer to eat them just like this.

They are both soft and chewy at the same time.  And the light sweetness and tartness from cranberries is a really nice touch.

Or you can also slice them open.  Toast in a toaster for a couple minutes.  Spread with your favorite cream cheese or jam.

DSC_2672 2 copy.jpg

Savory Chinese Crepe

Savory Chinese crepes are widely popular in mainland China.  They are usually sold by food trucks or food vendors.  One crepe can be done in a couple minutes from start to finish.  It is tasty and cooked really fast so that it is a lot of people’s breakfast or late night snack food on the go.

The traditional authentic version of savory Chinese crepe batter calls for mung bean flour and a few other secret ingredients like beef broth.  I substitute with French crepe batter.  It is equally delicious if not better. And it is simpler and easier O(∩_∩)O~

Crepe ingredients (makes 8 to 9):

1 cup all purpose flour
1 cup whole milk
1 large egg
1/4 teaspoon salt


Crispy thin crackers (make 14 to 16):

1 cup all purpose flour
1/3 cup water
1 teaspoon baking powder
1/4 teaspoon salt


Crepe seasoning and toppings:

Crispy thin crackers
eggs
chopped cilantro
chopped green onion
sweet bean sauce
fermented tofu sauce
sriracha chili sauce
white sesame seeds


Directions:

Just like cooking French crepe, you will need a large cast iron skillet and a crepe spreader.  I use a 12 inches cast iron skillet which is perfect for making crepes. I found it in a local cookware store years ago.  What a pity they don’t make them the same way anymore.

My crepe spreader is custom made just for me!  (Yes, my husband made it.)

I start with making crispy thin crackers.  You can use wonton wrapper instead.  After being deep fried, wonton wrapper taste great too.

Mix together flour, salt and baking powder in a medium bowl.  Gradually add water while whisking with a wooden spoon.  When everything starts to come together, knead with hands for a couple minutes; and then transfer to a well-dust wooden board; and knead until the dough ball is smooth and elastic.

Wrap with plastic wrap and allow the dough to rest for at least 30 minutes.

Flatten the ball of dough with a large rolling pin.  And then feed it through the pasta roller for KitchenAid stand mixer for several times.  At the one last time, set the thickness to 5.

Cut the dough sheet into 5 by 3 inches pieces.  Make a couple cuts in the middle of each piece to prevent puffing during deep frying process.

Deep fried in vegetable oil until both sides are golden brown.  Remember, wonton wrapper is a good substitute here if you don’t want to make everything from scratch.

Drain and cool them

You can store any extra crispy crackers in a sealed ziploc bag and they should last for about a week at room temperature.

Here are the sweet bean sauce, fermented tofu sauce and siracha chili sauce needed in this recipe.

Mix flour, milk, egg and salt in a blender until the batter is smooth.

Heat the cast iron skillet over medium low heat.

Spray the pan with oil and then wipe it with paper towel.

Add 2 to 3 tablespoons batter.

Spread it thinly and evenly with crepe spreader.

I am behind the camera.  So it means my husband is cooking! O(_)O~

Add an egg

Spread it too

Top with white sesame seeds, chopped green onion and cilantro.

Flip the whole crepe with a spatula.

Brush with fermented tofu sauce.  I like to use silicone brushes because I can just toss them into the dish washer when I am done.  How convenient is that!

Brush with sweet bean sauce. There is no rule of how much of what should be added.  You can add the seasoning just to your own taste.

Add a crispy cracker to the center

Fold from one side

And then the other side

Fold one more time in the middle

Now you have a savory Chinese crepe! bon appetit!

And I made this one O(∩_∩)O~

Tiramisu

中文: 提拉米苏

Tiramisu, even the name sounds so beautiful!  I love making tiramisu for parties.  It is always gone before you know it.  Sometimes I would make it just for myself.  With a cup of hot coffee and a good book in hand, it feels like heaven! O(∩_∩)O~

You can make it whatever shape you want.  Tiramisu in dessert cups are so cute and pretty.

Ingredients:

8 oz mascarpone cheese
2 egg yolks
1 1/4 cup heavy cream
2 tablespoons rum and coffee liqueur (recommend Kahlua)
2 shots of espresso

18 to 20 lady finger cookies
1/3 to 1/2 cup sugar (use more if you have a sweet tooth)
1 teaspoon gelatin powder
2 to 3 tablespoons water
unsweetened coco powder

Directions:

Get a 6 inch round or square cake pan ready.

Add egg yolks and half of the sugar to a double boiler bowl.  Beat the yolks and sugar until yolks turns creamy white color with electric mixer on medium low speed when the double boiler is simmering over low heat. 

Remove from heat and allow the yolks to cool down to room temperature.

In another medium bowl, add mascarpone cheese.  Beat with electric mixer until the cheese is smooth.  Add the cheese to yolk mixture.  Beat until well combined.

Sprinkle the gelatin powder over water in a bowl.  Let it sit for a couple minutes and then microwave it for 20 to 30 seconds or until it completely melts.  Cool until it is no longer too hot to touch.  Add to the yolk and cheese mixture.  Whisk until well combined. 

Replace the electric mixer with a clean pair of beaters. 

Beat the heavy cream in a medium bowl just until it begins to hold it shape.  Gradually add the other half of sugar in between.

With a rubber spatula, gently fold the whipped cream into yolk and cheese mixture.

Mix rum and coffee liquor and espresso coffee in a small bowl or deep plate.  

Deep the lady finger cookies in the coffee mixture for a few seconds.  And then layer them at the bottom of glass cake pan.

I didn’t find lady finger cookies in my local grocery store.  The closest ones I got are Stella Doro margrite cookies.  I did a quick online research when I was standing in the cookie aisle.  These cookies would work too.  You just need to soak them in the espresso mixture a little bit longer than the regular lady finger cookies.

Top with 1/3 cheese mixture and smooth it out with a spoon.

Add another layer of lady finger cookies. 

Top with cheese mixture again.  Repeat the process until the cheese and cookies are done.

Chill in the refrigerator overnight.

Sprinkle with shifted unsweetened coco powder on the top.

I make a square one and another two cute mini tiramisu in dessert cups.

My afternoon gets so much better with a piece of tiramisu and a cup of black coffee! O(∩_∩)O~

Beef Noodle Soup with Beef Shank and Tendon

I enjoy making all kinds of soup from scratch at home.  They are great right off the stove.  Sometimes I use them as the soup base for Asian hot pot.  Most times I use them to use noodle soup and rice noodle soup.

The picture above is beef rice noodle soup.  And the picture below is beef noodle soup.  Can you tell the difference? O(∩_∩)O~

Ingredients for beef soup:

2 to 3 pounds of beef shank
1 1/2 to 2 pounds of beef tendon
2 to 3 star anises
2 to 3 tablespoon rice cooking wine
1 small piece of ginger root, smashed with knife
4 to 5 dried chili peppers , cut into small pieces
8 to 10 black peppercorns
2 to 3 bay leaves
1 black cardamom pot
2 to 3 cloves
1/4 teaspoon Sichuan peppercorns
2 to 3 pieces of dried rhizome/ dried ginger slices
1 teaspoon sugar
1/4teaspoon ground white pepper
chopped cilantro
a few drops of sesame oil
chili oil sauce
water for stewing
salt to taste

Ingredients for noodle:

1 cup of bread flour
1/4 cup of water
a pinch of salt


Directions:

Soak both beef tendon and shank in cold water for at least an hour.  Change the water twice in between.

Here are the spices for beef soup: star anises, dried peppers, black peppercorns, dried rhizome/ dried ginger slices, Sichuan peppercorns, black cardamom pot, bay leaves and cloves.  Wrap them with a piece of coffee filter paper.

Tie it up

In a 5.75 quart Staub cast iron pot, add water, beef tendon and shank, rice cooking wine, spice bag and ginger root.

Heat the cast iron pot over high heat.  When the soup comes to boil, remove the white gray bubbles on the top with a spoon.

Cover with lid and reduce to simmer for 3 to 3 1/2 hours. Beef tendon might need longer time to cook.

In the last 15 minutes cooking, add salt, sugar and ground white pepper to taste.

Now we have a pot of wonderful beef soup.

When the soup is being stewed, I make the noodle.

In a medium bowl, add bread flour, water and salt.  Whisk with a pair of chopsticks or a wood spoon.  When everything starts to come together, transfer the dough to a dusted wooden board. 

Knead with hands until the dough is smooth.

Cover with plastic wrap and allow it to rest for at least 30 minutes.

Flatten the ball of dough with a large rolling pin.  And then feed it through the pasta roller for KitchenAid stand mixer for several times.  At the one last time, set the thickness to 3.

Remove the roller, and put on the spaghetti cutter

Run the thin dough sheet through pasta cutter.

I do enjoy this moment.

What to do next is pretty easy and simple because most of the hard work is done by now.

Cook the fresh noodle in a large pot of boiling water for 30 to 45 seconds.  Drain well and add it a medium bowl, along with beef soup, sliced beef shank and tendon, a couple teaspoons of chili oil sauce, chopped cilantro and sesame oil.

The beef tendon and shank are sliced hot so they are kind of impossible to slice thinly.

The next morning, I made another bowl of beef rice noodle soup exactly the same way.  I allow the beef shank and tenon to completely chill in the refrigerator before slicing them.  Now they look much better in the soup. O(∩_∩)O~

Time to enjoy!

Espresso Coffee Made with Moka pot

Both my husband and I are really into coffee recently.  Just simply enjoy a cup of freshly ground and brewed coffee and the lazy cozy Sunday afternoons in the street coffee shop with a good book. O(∩_∩)O~

I pick up the habit to make espresso coffee with moka pot http://amzn.to/1nzUBj5 from a couple Italian friends.  Whenever I hang out with them, there is always a pot of freshly brewed coffee on the stove.  It goes so well with cookies and other sweets!

Ingredients:

1 1/2 to 2 tablespoons coffee beans (use more if prefer stronger darker coffee)
1 /1/2 cups water

I use decaf coffee beans bought from starbucks store.

Add coffee beans to a coffee grinder.  Grind for a few seconds

Add water. There is a maximum water mark on the moka pot.  Be careful not to add too much water; otherwise you might end with a coffee mess on the stove. 

Mine is small.  One and a half cups are the maximum capacity.

Load the ground coffee.

Heat over medium high heat

Soon, the coffee will come out from the top.

More and more coffee comes out.  You will need to cover it now or it will splatter everywhere.

When it stops, remove the moka pot http://amzn.to/1nzUBj5 from heat.

Now enjoy it whatever way you like.  My favorite choice is macaroons!