Homemade Hot and Spicy Noodles

This is a very special kind of noodle.  It originated in Southwest of China, and now it is widely popular through the whole main land. 

Unlike the noodle people have in mind, this one is not served hot in soup.  It is tossed with all kinds of spices and seasoning, more like noodle salad.  What really makes it special is how the noodle is made.  Simply put, you need to knead a piece of dough, and then you need to work on the dough in water to separate the wheat gluten and starch, and then make noodle out of starchy water.  It is a very interesting process but also quite labor intensive.  Although it is very widely popular in China, not many people like to make it from scratch at home.  So many restaurants, food trucks and street vendors sell these noodles that you can get them almost anywhere and anytime.

My husband and I live in a small town in Michigan where there is no Asian grocery store.  That means I need to DIY any authentic Chinese food we crave for, and fortunately, I very much enjoy doing so. And I also enjoy sharing with everyone else. O(∩_∩)O~

I use kitchenaid stand mixer to work on the dough and to separate wheat gluten and starch.  It is traditionally done by hands.  Stand mixer is such a great help in my kitchen!  

For the noodle

2 1/2 cup bread flour
1/2 teaspoon salt
1 cup water
9 to 10 cups water (to work with dough)

Noodle seasoning

Red chili oil sauce (homemade or available in Asian grocery store)
sesame oil
garlic water (2 gloves of garlic, minced and soaked in 2 tablespoons water)
soy sauce
sugar
chopped green onion
chopped cilantro
cucumber, peeled and cut into French fries size
freshly roasted peanut, crushed
rice vinegar
1 tablespoon peanut butter
1 to 2 tablespoon sesame paste


Direction

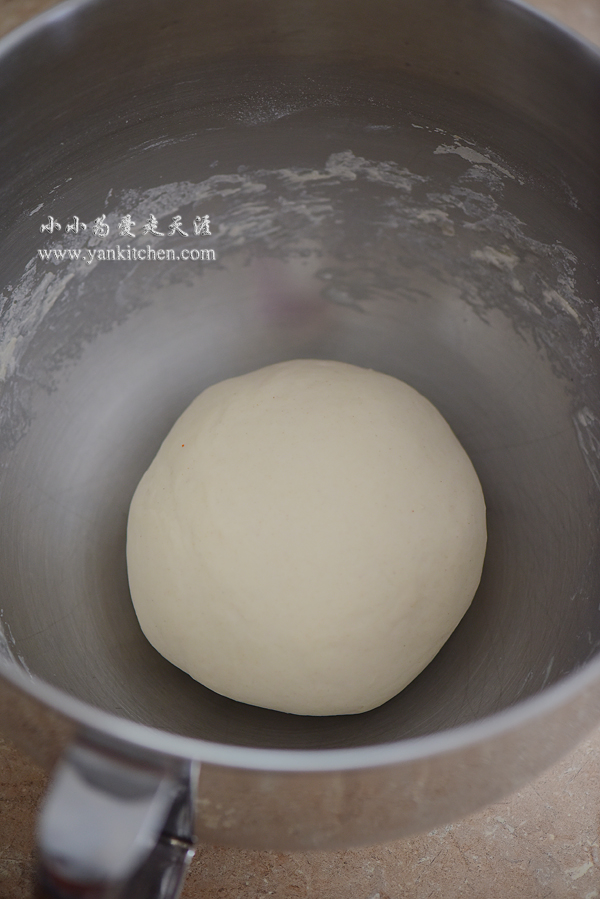
 In the stand mixer mixing bowl, add flour, salt and water.  Turn it on and knead the dough at speed 2 for 12 to 15 minutes.

The dough is becoming smooth and elastic.

Cover the dough and allow it to rest at room temperature for at least 30 minutes.

Switch the dough hook to paddle. Add 1 1/2 cups water into the mixing bowl.

What I am using is KitchenAid professional600.  The mixing bowl is 6 quarts so I can do this without getting a big mess in the kitchen.  It is not recommended for any mixing bowl smaller than 6 quarts. 


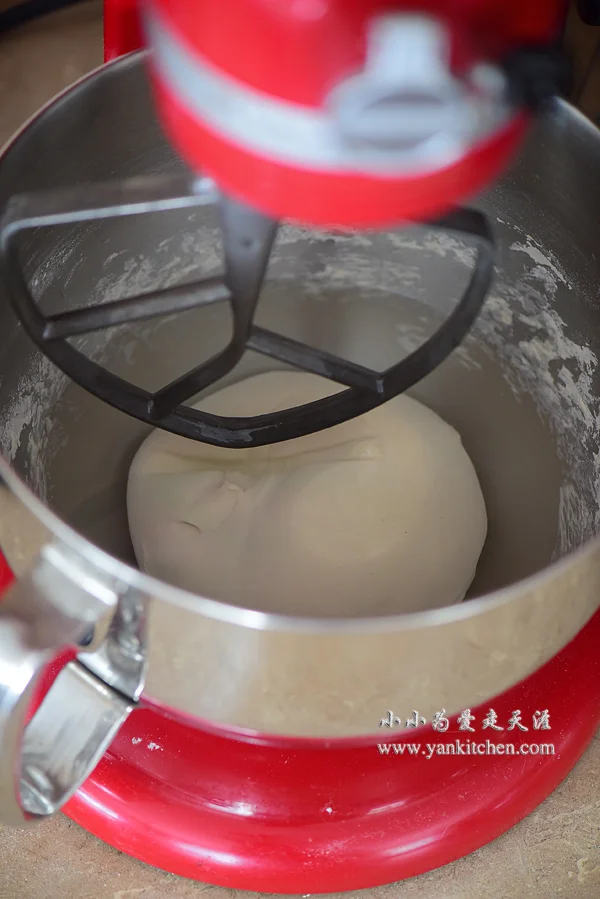
Put on the pouring shield.  Turn on the machine and set to speed 2 again.  Knead for 4 minutes.

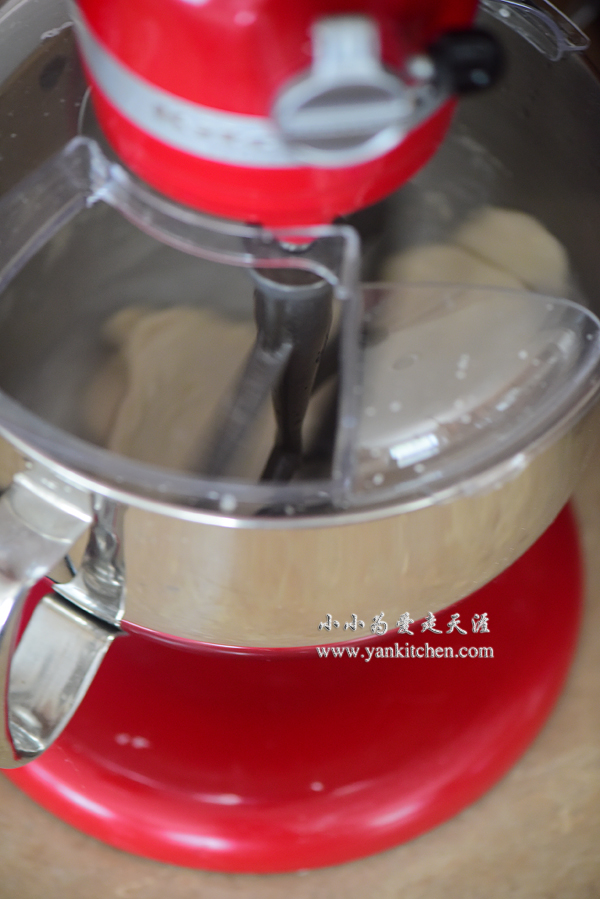
4 minutes later.  The water becomes white and starchy.

Drain the water to a big glass bowl.

Add another 1 1/2 cup water.

Speed 2, knead for 4 minutes.

Water becomes starchy again.  

Drain the water to the big glass bowl. 

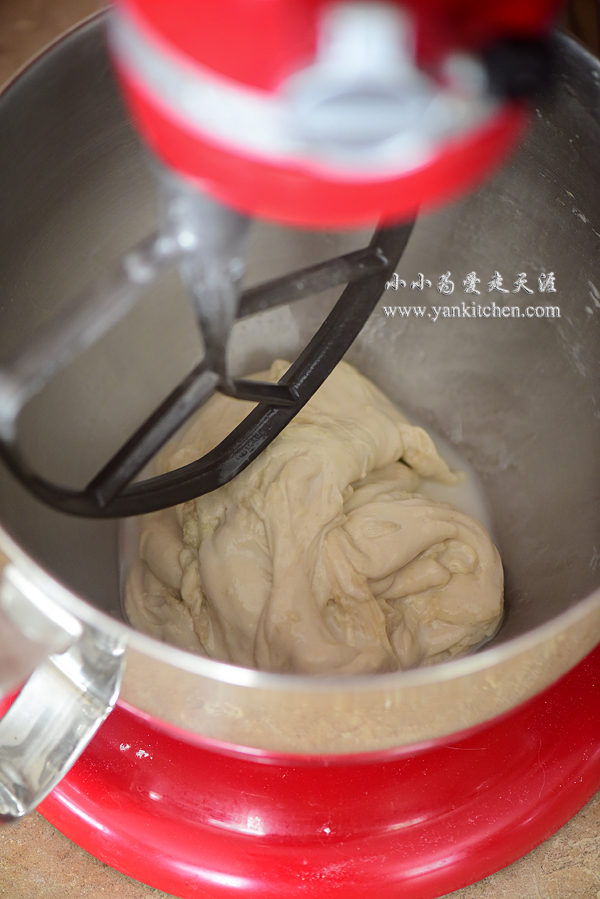
After the third kneading

After the forth kneading

The fifth

After the sixth kneading, the water is pale, which means most starch has been extracted.  What we have left in the mixing bowl is wheat gluten. 

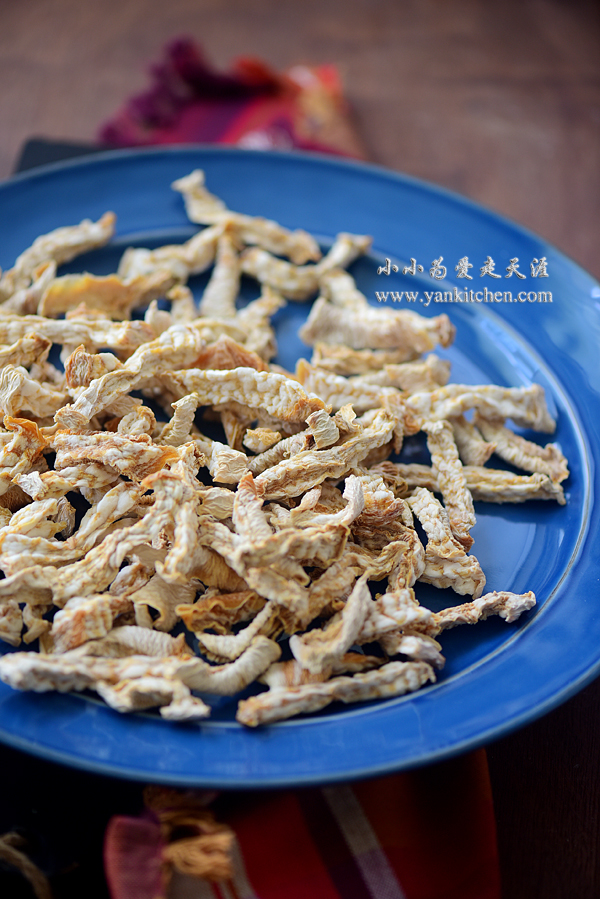
Steam the gluten on high heat for 16 to 20 minutes. 

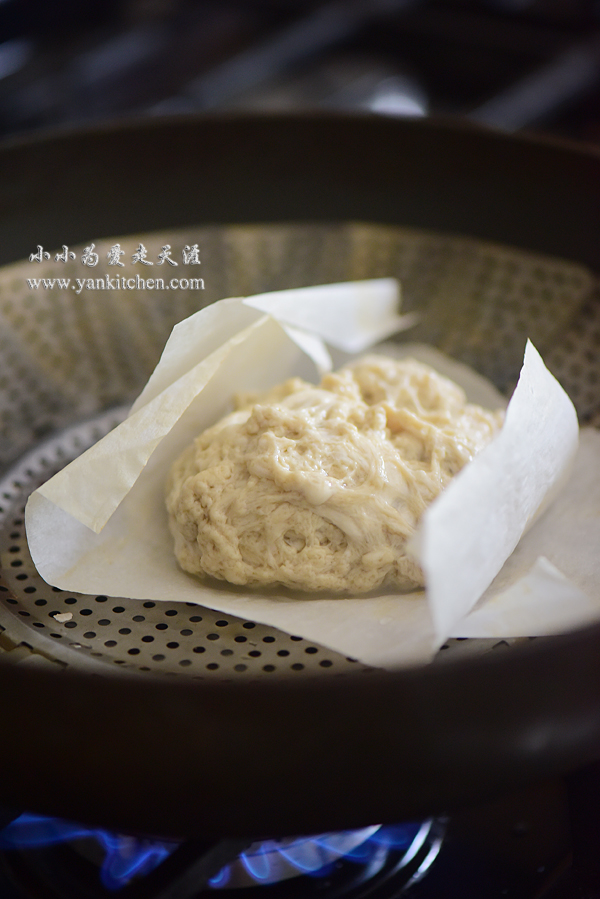
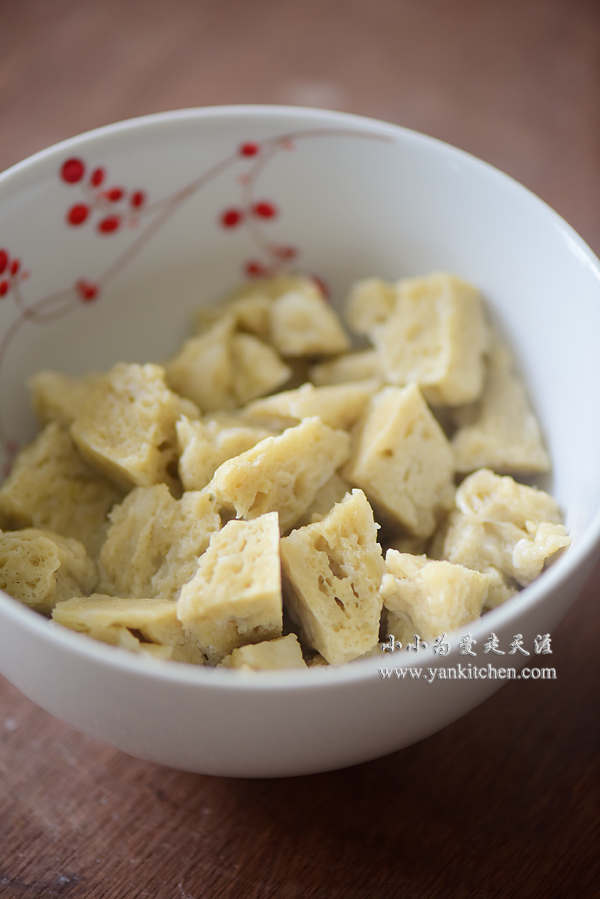
Cool for 10 minutes and then dice it up. 

All the starchy water has been collected in a big glass bowl.   

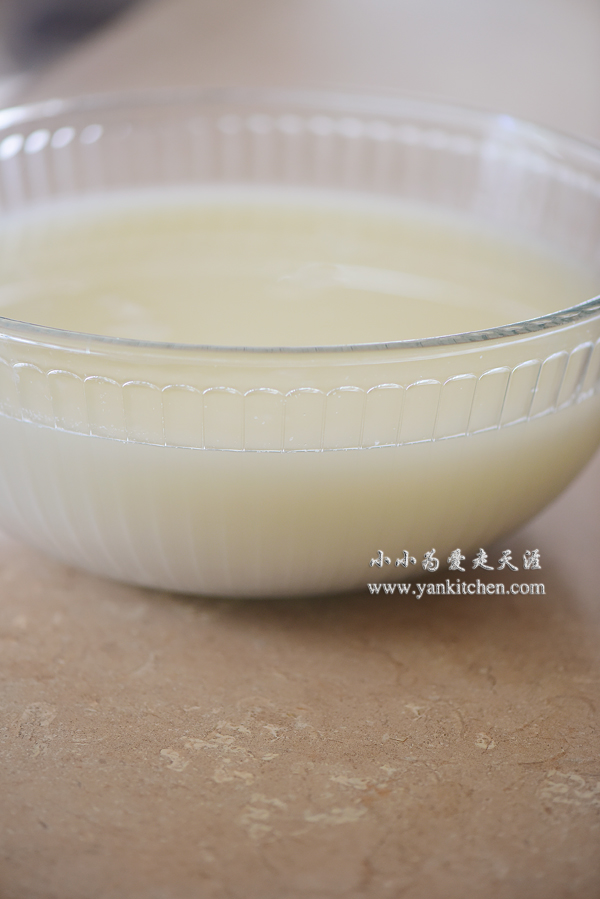
Cover and let it sit for at least 4 hours. 

You can see that starchy water separates again.  All the starch sinks to the bottom.

Drain the clear water on top.  Please remember to do it very gently; otherwise the starch may be stirred up again.

With a whisk, whisk the remaining starchy mixture into smooth batter. 

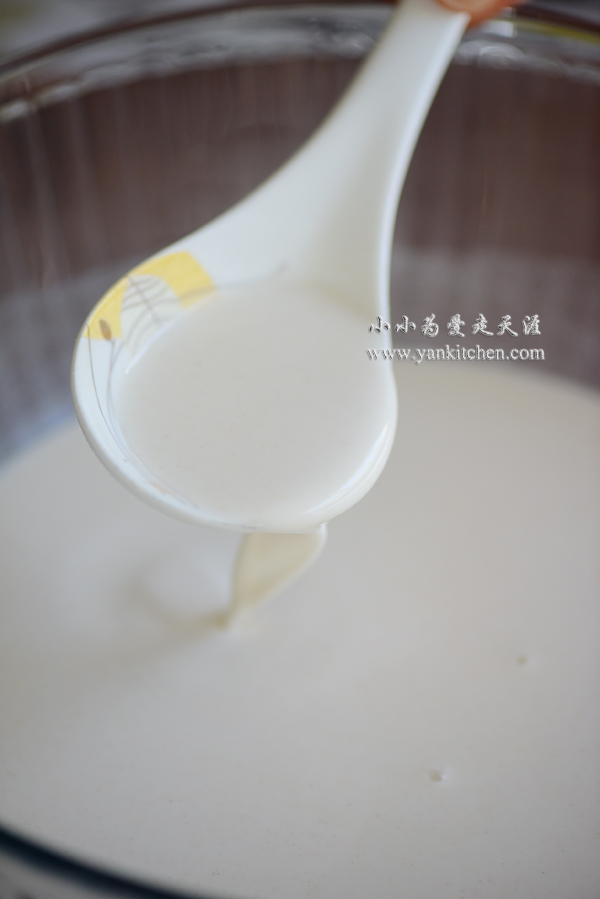
Bring a large pot of water to boil.

Brush two 8 inches wilton cake pans with a little bit of oil. 

Add a big spoon of batter to a cake pan.  

Swirl the pan so that the batter can evenly coated the pan. 

Place the pan on boiling water top, cover, and steam on high heat for 1 minutes.

Fill another pot with ice water.

When the pan has been steamed for 1 minute, transfer the pan from boiling water pot to the one filled with ice water.  The ice water will cool down the cake pan fast and it would be easier to remove noodle from pan.

Here is one big piece of noodle!

It is almost paper thin and elastic.

Repeat the steaming and cooling process until all the batter is used.  You should be able to get between 14 and 18 pieces.

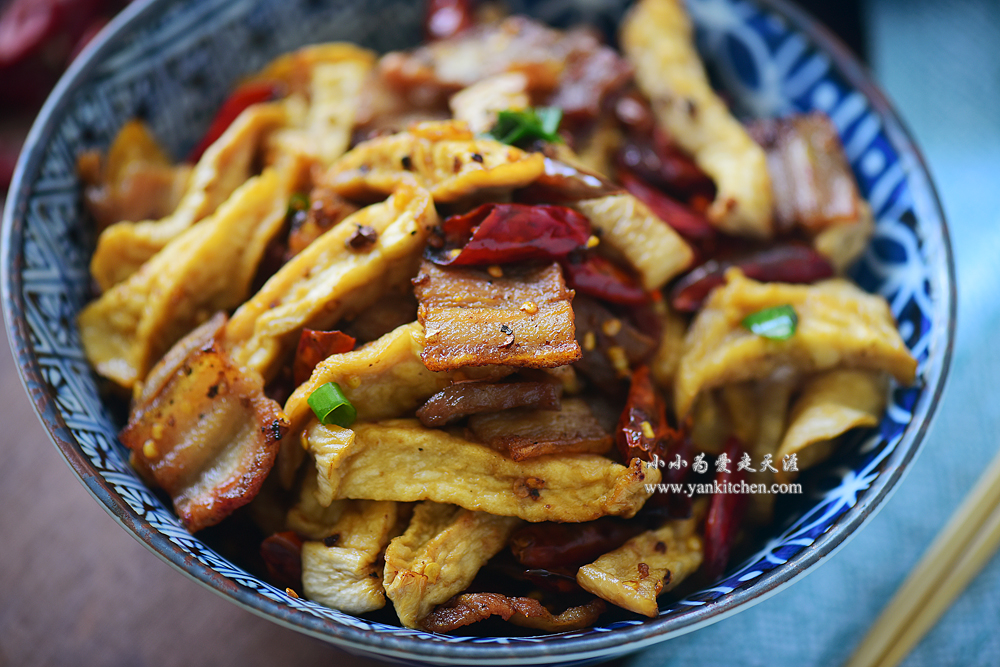
Cut them into thick strings and place in a big bowl. 

Add the prepared noodle seasonings. There is no rule here how much of what should be added.  You can add whatever to create your own flavor. 

I usually add red chili pepper oil sauce, sesame oil, garlic water, soy sauce, sugar, green onion, cilantro, cucumber, vinegar, peanut butter, sesame paste, and the diced steamed gluten bread.  

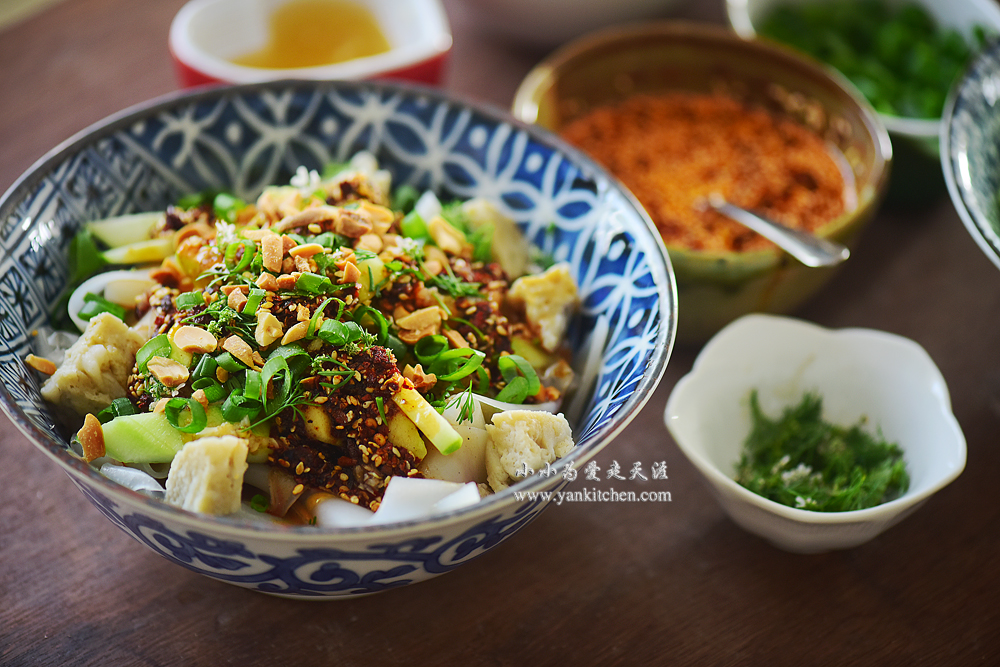
Mix gently until everything combines together, sprinkle with crushed peanut and serve immediately. 

That is one bowl of authentic hot and spicy Chinese noodle!

Pickled Garlic

中文:糖蒜

I planted some garlic in my vegetable garden in spring because young garlic plants are one of the essential herbs in Sichuan style cooking.   And the young garlic bulbs are always pickled in a mixture of sugar, salt and vinegar.  They go really well with lamb. 

I didn’t plant many in spring.  Looks like I need to plant more next year. 

Remove the stems and peel the outside skin. 

Ingredients

10 to 12 young garlic bulbs
3 cold boiled water
1 to 2 teaspoons salt
1 cup vinegar
2/3 to 3/4 cup sugar

Directions

Rinsed the garlic bulbs under running water; drain well; and dry them on a clean rack for a couple hours.  Make sure there is no water left on the surface.

In a large bowl, add salt and cold boiled water.  Whisk until the salt dissolves.  Add  garlic bulbs; soak overnight. 

The next day, drain all the water.  Add garlic to a clean mason jar.

In a small bowl, add sugar and vinegar.  Whisk until sugar completely dissolves.  Add the mixture liquid to mason jar too.  

Cover with lid.  Pickled garlic would be ready in 20 to 30 days, depending on the garlic sizes and ripeness.  The younger the garlic bulbs are, the shorter time it would take.  Vice versa. 

The younger the garlic is, the better it tastes.  It is usually served as a side dish or condiment for cooked lamp or Chinese hotpot. 

Blueberry Waffles

The blueberries are in season in Michigan right now, my happiest time of year! O(∩_∩)O~  There are many blueberry farms around town.  One of the must do things in summer is to go blueberry picking.  

Besides from eating fresh blueberries, I also make tasty desserts and snacks with them.

Blueberry corn bread: http://www.yankitchen.com/blog/gszloxao30lv199lbn61q1tjofpn59

Blueberry crisp:http://www.yankitchen.com/blog/2014/10/18/-blueberry-crisp

Blueberry jam:http://www.yankitchen.com/blog/81serm5m06h5n016u8uvmf1x5t29j7

Blueberry yogurt:http://www.yankitchen.com/blog/homemade-blueberry-yogurt

Or, you can make blueberry waffles!O(∩_∩)O~


Ingredients:

1 cup all purpose flour
1/4 cup whole wheat flour
3/4 to 1 cup buttermilk
2 eggs
2/3 teaspoon vanilla exact
3 tablespoon oil
2 baking powder
1/2 teaspoon baking soda
1/4 teaspoon salt
1 1/2 to 2 cups fresh blueberries
oil for greasing waffle machine
honey

Directions:

In a medium bowl, combine all purpose flour, whole wheat flour, baking powder, baking soda and salt; shift together.

In another big glass cup or bowl, combine eggs, oil, vanilla and buttermilk.  Whisk until it is smooth.

Add shifted flour to egg mixture.  Whisk together just until the flour is folded in.  Don’t over mix; otherwise you are going to end up with gooey chewy waffles.

With a spatula, fold in blueberries. 

Preheat the waffle machine.

Spray both sides with oil.

Add blueberry batter.

Cover and turn it upside down, or just follow your own waffle machine menu instruction.  Wait for the ready signal from the machine.

There it is, a freshly made blueberry waffle, crispy on the outside, soft and fluffy on the inside!

Top it with fresh berries and honey.  O(_)O~

Pumpkin Sweet Rice Cakes

中文:南瓜糯米饼

I have some leftover steamed pumpkin in the refrigerator.  I decide to make some Asian sweet rice cakes with it.  Pumpkin and sweet rice are also a perfect combination.  Sweet rice flour has a very mild nutty flavor, and pumpkin adds a delicate refreshing and rich flavor to the cakes.

Ingredients

1/4 steamed mini pumpkin
1 cup sweet rice flour (adjust the amount according the pumpkin flesh)
3 to 4 tablespoons sugar
1 teaspoon oil
2/3 cup sesame seeds
oil for pan frying sweet rice cakes


Directions

Remove skin from pumpkin, cut into small pieces and place them in a mini food processor.   

Process until you have pumpkin puree. A fork will do the work just fine if you don’t want to use a food processor here.


In a bowl, combine sweet rice flour, sugar, oil and pumpkin puree.  

Whisk with a pair of chopsticks until most dry flour is gone.  Transfer to a well-dusted wooden board and knead into dough.

Divide the dough evenly into 12 pieces.  Roll each piece into a small round smooth ball.  

Quickly dip the balls into water and roll over in the pan filled with white sesame seeds. 

Gently press them down.

Heat a cast iron skillet over medium low heat.  Add oil, and then add sweet rice cakes.  Cover and each side cooks for 4 to 5 minutes. 


They go well with coffee or tea. Enjoy!  O(∩_∩)O~

Stir-fried spicy pork and daikon

Pork belly and daikon, two of my favorite ingredients, can create such a wonderful flavor when they are stir fried together.  I air dry the daikon first, and then rehydrate it with water.  The dehydration and rehydration process makes daikon more al dente and chewy.  The daikon flavor is also more intense by doing so. 

Ingredients

1 piece of pork belly (about 1 1/2pound)
1 1/2 cup dried daikon (also available in Asian grocery store)
2/3 cup dried red chili peppers
2 teaspoons Sichuan pepper corns
3 cloves of garlic, peeled and sliced
2 to 3 tablespoons soy sauce
1 tablespoon rice cooking wine
1 to 2 teaspoons oyster sauce
3 to 4 tablespoon chicken stock/ water
1/8 to 1/4 teaspoon sugar
freshly ground black pepper
chopped onion
2 to 3 tablespoons oil for cooking
salt to taste


Directions

Dried daikon is available in Asian grocery store.  You can also make it at home.  It is very easy.  All you need to do is to peel the daikon, cut it into string cheese size pieces and then air dry in a food dehydrator and under the sun.  I prefer to air dry daikon pieces under the hot summer sun.  It takes two to three days to get dried inside and out.

Keep any extra dried daikon in Ziplock bag and store in the refrigerator.  It should be able to last a really long time. 

Two hours before cooking, soak dried dakai in water.  After it is totally rehydrate, rinse a couple times under running water.

Thinly slice the pork belly.

Dried red chili peppers are sometimes covered in dust.  I like to rinse and drain them and then cut into pieces.

Heat a wok over high heat.  Add oil, and then add sliced pork belly.  Sprinkle with freshly ground black pepper.  Stir fry over high heat until the pork turns slightly golden brown.  Add garlic, Sichuan peppercorns.  Stir fry until the spices are toasted with pork fat.  Add daikon; stir fry for another couple minutes; add chicken stock/ water, oyster sauce, rice cooking wine and salt.  Continue to stir fry until all the liquid is absorbed by pork and daikon.  Sprinkle with chopped green onion and transfer to a big bowl or plate.  Serve immediately. 

It is the perfect combination. O(∩_∩)O~