Asian sweet sesame cake balls

中文菜谱:开口笑

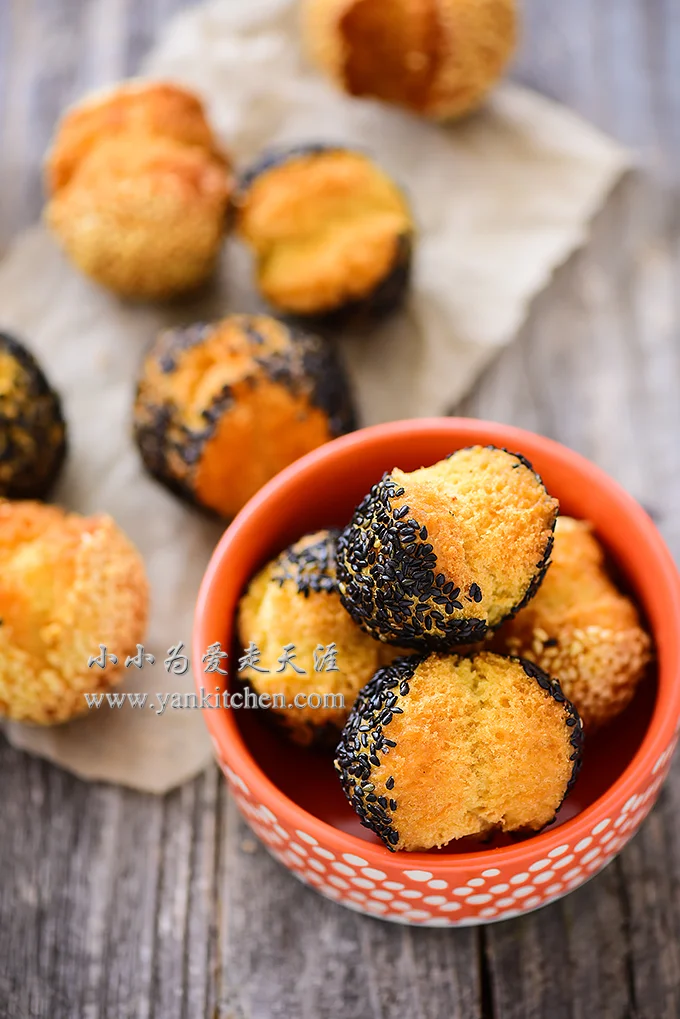
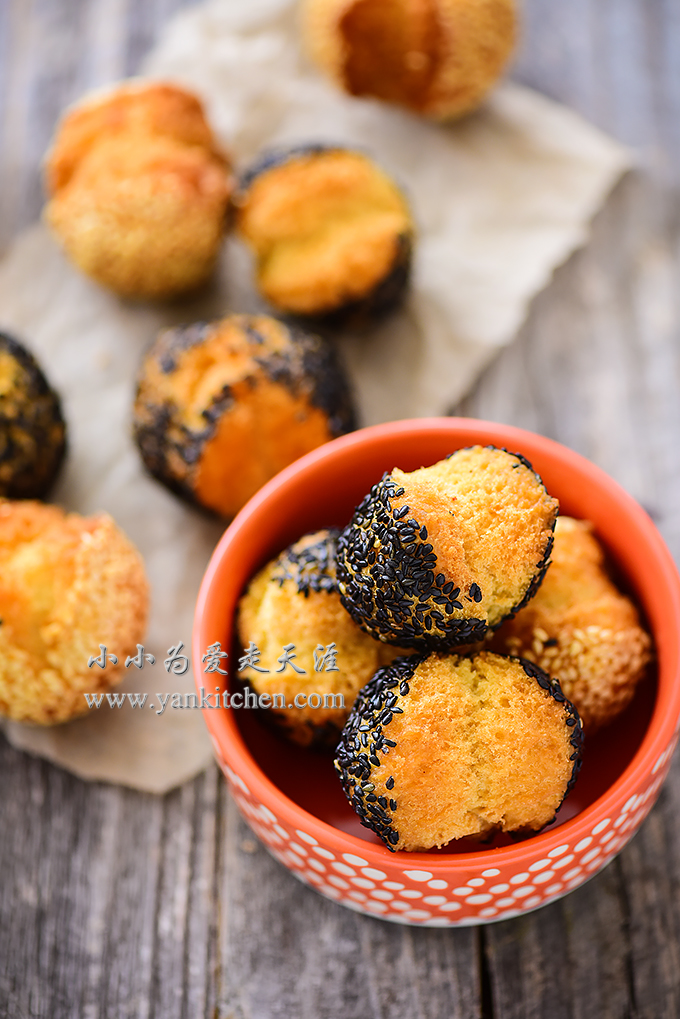
The sesame cake balls you see here rank number one on my childhood favorite list.  Cake balls are coated with sesame seeds and then deep fried to golden brown.  They taste crunchy on the outside, soft and fluffy and sweet on the inside.  They are the most delicious snacks I could think of as a child.

Ingredients:

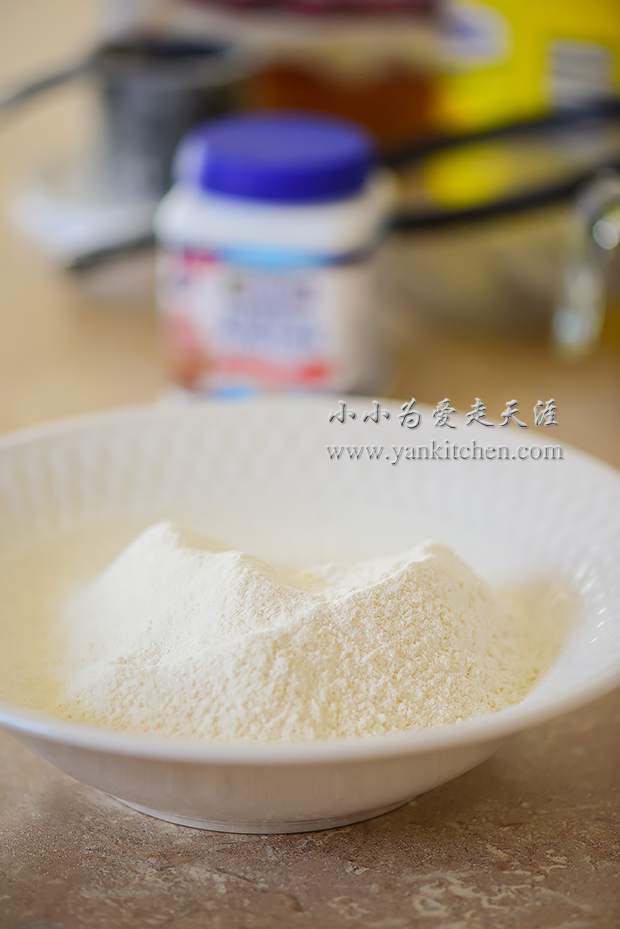
2 cups of cake flour
1/2  egg
1/4  cup water
1 teaspoon oil
1/2 cup sugar (use more if you have a sweet tooth)
1 and 1/2teaspoon baking powder
1/4 teaspoon baking soda
1/2 cup white sesame seeds
1/2 cup black sesame seeds
oil for deep frying


Directions:

In a medium bowl, add water and sugar.  Whisk until the sugar dissolves.  Add oil and egg.  Whisk until well combined.

Shift together cake flour, baking powder, baking soda.

Add shifted flour to egg mixture.  Mix with a wooden spoon or a pair of chopsticks.

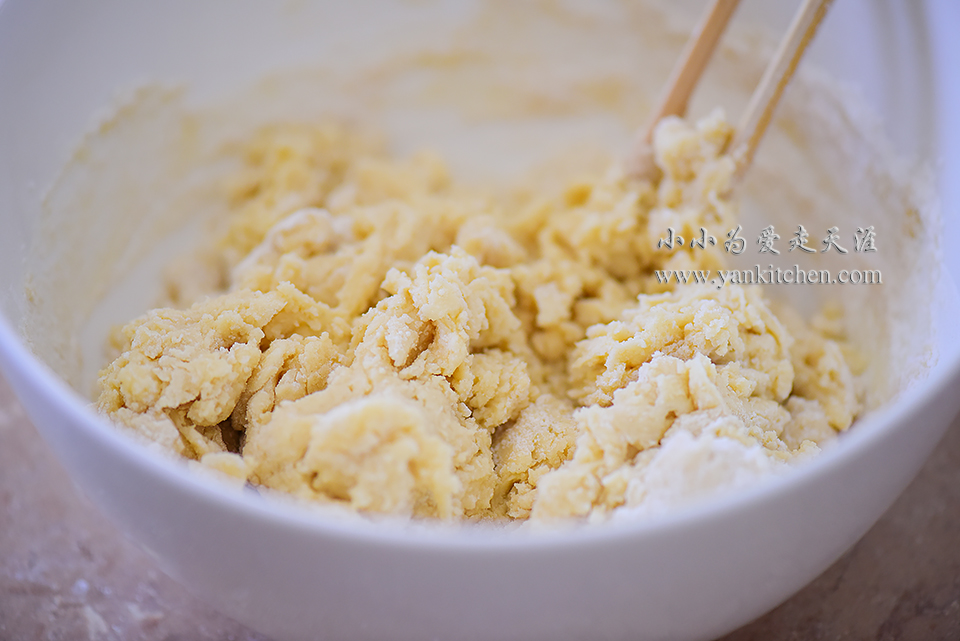
When everything starts to come together, transfer the dough to a well dusted wood board. Knead with hand until a dough ball forms.

Divide into 28 to 38 equal pieces.  I like to make them each between 20 g to 30g.

Roll each piece into a small dough ball.  Quickly dip in water and then coat with black sesame seeds.

DSC_6124 2 copy.jpg

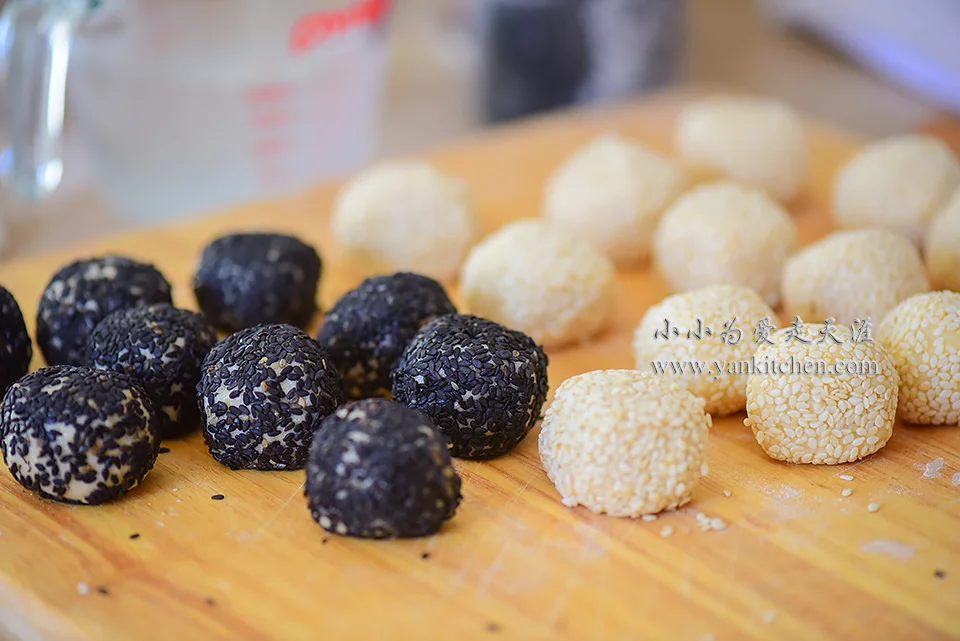
Or you can also coat them with white sesame seeds.

Deep fry them until golden brown.

Bon appétit!

Oven Roasted Teriyaki Chicken Wings

中文: 照烧烤翅

DSC_6171 2 copy.jpg

Whenever I am not in the mood for cooking, I bake chicken wings.  Who doesn’t love wings? O(∩_∩)O~ 

My oven roasted chicken wings are simple and easy to make but still loaded with tons of flavors. 

DSC_6155 2 copy.jpg

Ingredients:

6 large chicken wings
3 to 4 tablespoons soy sauce
1 to 2 ground chili pepper
1 teaspoon sugar
1/2 teaspoon minced garlic
1 to 2 tablespoons oyster sauce
1 tablespoon rice cooking wine
1 to 2 teaspoons white sesame seeds
freshly ground black pepper
salt to taste
3 to 4 tablespoons teriyaki sauce

Directions:

Rinse the raw wings under cold running water.  Chop each wing into two parts.

Add soy sauce, ground chili, sugar, garlic, oyster sauce, rice cooking wine, white sesame seeds, black pepper and salt.

DSC_5803 2 copy.jpg

Mix the wings and seasoning.  Allow them to marinate for at least 2 hours or overnight.

DSC_5809 2 copy.jpg

Preheat a toaster oven to 400F/ 204C. if you are using a large oven, preheat it to 425F/ 218C.

Line up the baking pan with aluminum foil .  Brush or spray the foil with oil.  Place wings about 1 inch apart on the baking pan.

DSC_6082 2 copy.jpg

Roast them for 40 to 50 minutes.

Brush the wings with teriyaki sauce, send them back to the toaster oven for 5 minutes, and then brush them again.  Repeat the process for a few times until the wings are beautifully colored.

DSC_6090 2 copy.jpg
DSC_6096 2 copy.jpg

Now it is time to enjoy!

We love to pair them with local Michigan beers. O(∩_∩)O~

DSC_6141 2 copy.jpg

Spinach Noodles

中文: 菠菜面条

DSC_6450 2 copy.jpg

Spinach is a popular choice when it comes to natural colorful noodles.  I love using spinach in my noodles or spaghettis.  The color is always vibrant and beautiful.  And the best part is that there is food coloring involved!  It is totally natural. O(∩_∩)O~  

Ingredients:

2 cups bread flour
1/2  to 2/3 cup spinach puree*
1/4 teaspoon salt
1 teaspoon oil

*for spinach puree:
1 bag frozen spinach (12 oz), thawed
1 to 1 1/2 cups of water

Directions:

In a vitamix, add thawed spinach and water.  Blend at high speed until the spinach juice is really smooth.  I use vitamix because it does such a good job.  It is fine to use a regular blender too.  Just blend it a little longer. 

Measure the needed amount spinach puree.  Divide the rest into 3 to 4 Ziploc bags and freeze.  When you want to make spinach noodles again, just take out 1 bag and thaw.  How convenient is that! 

In a medium bowl, whisk together bread flour, spinach puree, oil and salt.  When everything starts to come together, knead with hands until the dough is smooth.

The dough might a little firm to knead.  That is ok. 

Wrap it up with plastic wrap.  Allow it to rest for a couple hours, or overnight.

With a rolling pin, roll the dough as flat as you can.

And then feed it through the pasta roller for KitchenAid stand mixer for several times.  At the one last time, set the thickness to 3.

DSC_6386 2 copy.jpg

I also make egg noodle dough sheets.  Don’t they look pretty already?

DSC_6390 2 copy.jpg
DSC_6395 2 copy.jpg

Remove the roller, and put on the spaghetti cutter .

Run the thin dough sheet through pasta cutter.

DSC_6414 2 copy.jpg

They are getting prettier.

DSC_6408 2 copy.jpg
DSC_6416 2 copy.jpg

Now you have freshly homemade spinach noodles!  You can cook them right away; or you can just freeze them for later use like I do.

DSC_6475 2 copy.jpg

Tiramisu 2

I finally found lady finger cookies on my last out of town grocery trip, hooray!  So I can make my beloved tiramisu again!

The lady finger cookies have finer texture.  They are crunchier and crispier than the cookie substitute I used before.  And they taste so much better this time.  So, my advice to you all, use the real lady finger cookies.  They make such a huge difference!

The tiramisu recipe is the same as I posted before with detailed step by step photos and instructions.


Ingredients:

8 oz mascarpone cheese
2 egg yolks
1 1/4 cup heavy cream
2 tablespoons rum and coffee liqueur (recommend Kahlua)
2 shots of espresso
1/3 to 1/2 cup sugar (use more if you have a sweet tooth)
18 to 20 lady finger cookies
1 teaspoon gelatin powder
2 to 3 tablespoonswater
unsweetened coco powder

Directions:

Get a 6 inch round or square cake pan ready.

Add egg yolks and half of the sugar to a double boiler bowl.  Beat the yolks and sugar until yolks turns creamy white color with electric mixer on medium low speed when the double boiler is simmering over low heat. 

Remove from heat and allow the yolks to cool a little bit.

In another medium bowl, add mascarpone cheese.  Beat with electric mixer until the cheese is smooth.  Add the cheese to yolk mixture.  Beat until well combined.

Sprinkle the gelatin powder over water in a bowl.  Let it sit for a couple minutes and then microwave it for 20 to 30 seconds or until it completely melts.  Cool until it is no longer too hot to touch.  Add to the yolk and cheese mixture.  Whisk until well combined. 

Replace the electric mixer with a clean pair of beaters. 

Beat the heavy cream in a medium bowl just until it begins to hold it shape.  Gradually add the other half of sugar in between.


With a rubber spatula or whisk, gently fold the whipped cream into yolk and cheese mixture.

 Mix rum and coffee liquor and espresso coffee in a small bowl or deep plate.  

Deep the lady finger cookies in the coffee mixture for a few seconds.  And then layer them at the bottom of glass cake pan.

DSC_5603 2 copy.jpg

Top with 1/3 cheese mixture and smooth it out with a spoon.  Add another layer of lady finger cookies. 

Top with cheese mixture again.  Repeat the process until the cheese and cookies are done.

Chill in the refrigerator overnight.

Sprinkle with shifted unsweetened coco powder on the top.

DSC_5710 3 copy.jpg

Remove from the mold.  I use a square spring form pan this time, so it is really easy to do so.

DSC_5719 2 copy.jpg

Bon appétit!   O(∩_∩)O~

Popovers with blueberry jam

中文: 空心松饼

DSC_6006 3 copy.jpg

I wrote this popover recipe a couple years ago.  It was one of our favorite weekend breakfasts back then.   And now it is still our top choice for weekend breakfast. O(∩_∩)O~

Sometimes my husband volunteers to make these popovers.  So that you should know it simple and easy it is!

DSC_6027 2 copy.jpg

With a cup of freshly brewed coffee, sunny side up eggs and a few crispy bacon strips, this is a perfect Sunday brunch. 

Ingredients:

2 large eggs
1/2 teaspoon vanilla extract
1/2 cup whole milk
1/2 cup all purpose flour
1 teaspoon sugar
a pinch of salt
melted butter or oil spray for greasing the baking pan


Directions

You will need a popover pan for baking.  Muffin pan doesn’t work as well as popover pan.  Trust me; I tried. O(∩_∩)O~

Place the popover pan in the center of your oven. Preheat the oven to 425F/218C.  It is important that the pan is preheated too.

In a big cup or bowl, add all the ingredients.

DSC_5935 2 copy.jpg

With a hand blender, blend all ingredients together until the batter is runny and smooth.  If you don’t have a hand blender, a regular blender would work just as well.

DSC_5959 2 copy.jpg

Get the popover pan out of oven, spray or brush with oil or melted butter.

Pour the batter evenly and quickly.  Send back to oven and bake for 20 to 24 minutes or until popovers are puffy and golden brown.

DSC_5981 2 copy.jpg

It is fun to watch how they puff in the oven.

DSC_5999 2 copy.jpg

Serve immediately.  The moisture from inside of the popovers may make them mushy and chewy if you let them sit too long in the plate.

The recipe is for two people.  If you have more than two dining together, consider doubling the ingredients in the recipe.

We love to have the popovers with honey or jam.  They are so great together!

DSC_6012 3 copy.jpg