Steamed Beef and Buttercup Squash

My favorite squash is Kabocha squash, but unfortunately it is seldomly available in the city I live in.  So I always go with buttercup squash, which can closely resemble a Kabocha squash.  When cooked, the flesh is a little bit dry, sweet, and mild; and tastes like something between sweet potato and chestnut. 

I like to steam a buttercup squash whole with skin on.  The tough skin can keep the steam moisture out so that the flesh doesn’t get soggy.  I also like to steam it with meat.  The mild squash flavor goes well with pork, beef or chicken. 

Ingredients

1 medium sized buttercup squash
1/2 lb chuckeye beef
1/4 cup rice
1/2 teaspoon Sichuan peppercorns
1/8 teaspoon ground white pepper
1 1/2 tablespoon soy sauce
1/4 teaspoon sugar
1/2 to 1 tablespoon spicy bean sauce (available in Asian grocery store)
1/2 teaspoon rice cooking wine
1/4 teaspoon sesame oil
1/3 piece of fermented bean curd (available in Asian grocery store)
1/4 cup chicken stock
salt to taste


Directions

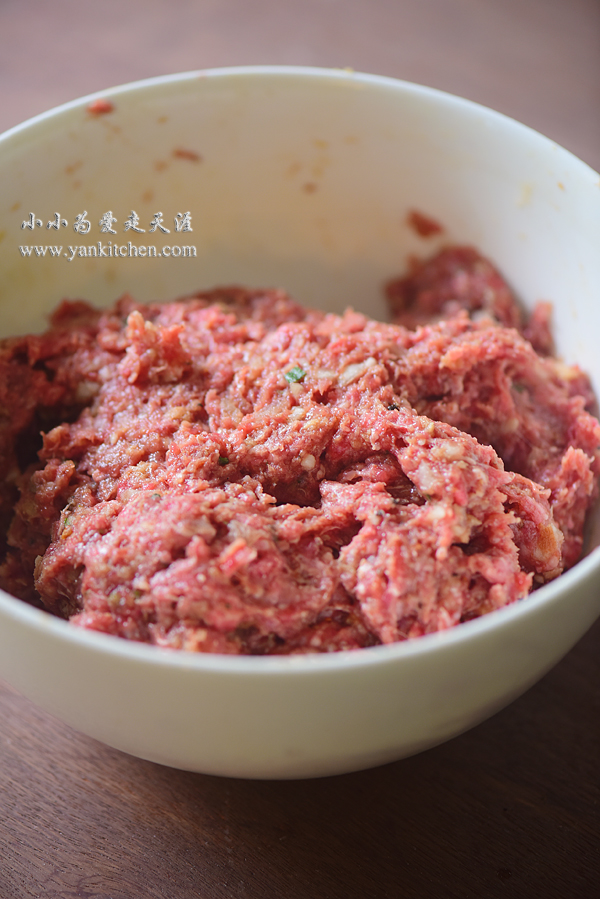
Thinly slice the beef.  In a bowl, add beef, white ground pepper, soy sauce, rice cooking wine, sesame oil, fermented soy bean curd and salt; mix well and let the beef marinate for at least 20 minutes. 

Cut off about 1/5 of the squash.  With a spoon, take the seeds and any inside squash tissue. 

Heat a wok over medium low heat with rice and Sichuan peppercorns in it.  Stir occasionally until the rice turns slightly brown.  Grind the rice and Sichuan peppercorns in a coffee grinder for 5 to 6 seconds. The rice should be coarsely ground now.  The Sichuan peppercorns will add a bit of kicks to it.

Add ground rice and chicken stock to the beef; mix well again.  Make sure each piece is evenly coated with ground rice. 

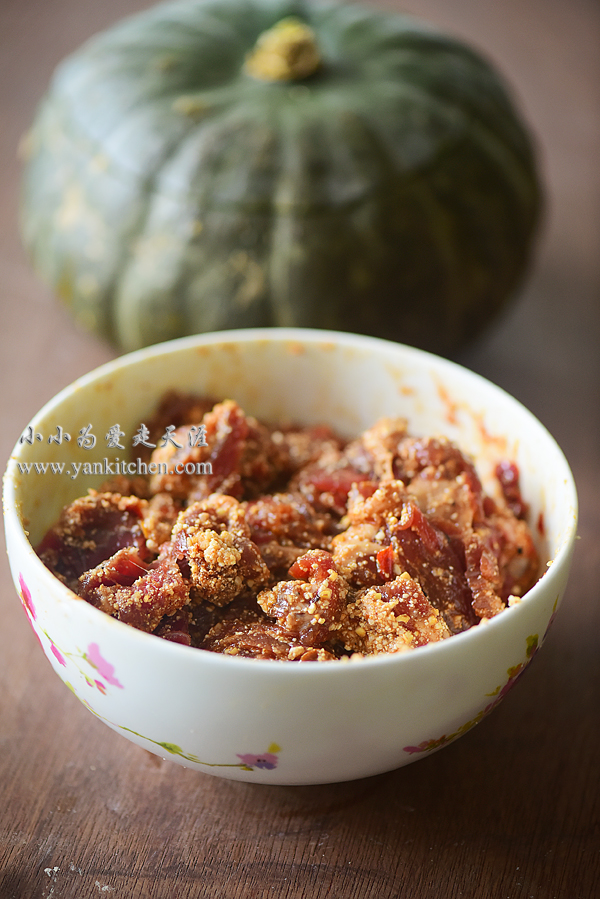
Stuff the squash with marinated beef. 

Steam it for 50 to 60 minutes. 

Cut the squash into 8 or 10 slices.  Serve immediately.  

Asian Style Stewed Chicken with Mushrooms

 中文: 小鸡炖蘑菇

This is one of my favorite ways to cook young hen or chicken.  The broth is loaded with intense chicken and mushroom flavor.  It is really the go-to comfort food during chilly season. 


Ingredients

1organic Cornish hen (can also be substituted with 6 chicken wings or drumpsticks)
1 package of crab mushrooms (150g, available in Asian grocery store)(约454克)
2 packages of enoki mushrooms (100g/3.5 oz each, also available in Asian grocery store)
1 piece of ginger, thinly sliced
2 cloves of garlic, peeled and sliced
3 to 4 fresh chili peppers
1 teaspoon Sichuan peppercorns
1 star anise
5 to 6 tablespoon soy sauce
1 to 1/2 teaspoon dark soy sauce
1 to 2 tablespoons rice cooking wine
2 to 3 teaspoons sugar
4 to 6 dried Asian dates (optional)
2 to 3 tablespoon cooking oil
salt and black pepper to taste
2 cups of boiling water


Directions

Trim the mushroom roots. Wipe clean with damn kitchen paper tower or rinse quickly under running water.

With a sharp cleaver, dice the Cornish hen into 1 by 2 inches pieces.  Soak in a large bowl of water for 20 to 30 minutes.  Rinse and drain well.

Heat a large wok over high heat.  Add oil and sugar.  Wait for the sugar to melt and become amber color.  Add chicken and stir fry for a couple minutes.  Add ginger, chili pepper, Sichuan peppercorns and star anise; continue to stir fry until the chicken is golden brown. 

Add boiling water along with soy sauce, dark soy sauce, rice cooking wine and dates.  Cover with lid and reduce the heat to simmer for 30 to 35 minutes.  Add mushrooms and salt to taste. Cook over high heat until the broth is boiling again.  Continue to cook over medium heat for another five to six minutes. 

DSC_8066 3 copy.jpg

I love to serve it in a mini cast iron wok which my husband brought back from China.  It can be heated over a candle or chafing dish fuel so that the whole dish can stay hot for the entire meal.  That is really comforting in cold winter. O(∩_∩)O~ 

mooncakes with red bean and lotus seed fillings

Mid-autumn Day is a very important traditional holiday in China.  It is like thanksgiving to American people.  It is the day that whole family and close friends get together and celebrate.  The moon on this night is said to be the brightest of the whole year.  So it is also a tradition for the Chinese people to admire and worship the moon after dark.

Of course we don’t worship the moon empty handed.  Mooncakes have been part of this tradition for thousands of years.  At first they were round shape to resemble the shape of the moon, which also why they were named mooncakes.  The square ones have been developed and they become my personal favorite.  I made most of my mooncakes with a square mold. 

The making of mooncakes is very labor intensive.  I start with making syrup weeks before the day, and I also make the cake fillings and the dough from scratch.  It is well worthy of the time I spent.

I would post the detailed recipe later. It took me a long time to make them from scratch and may take even longer to write down every single detail.  If you never had these before, and you are curious about what they taste like or interested in Mid-autumn Day tradition, I would simply just suggest you buy a box from Asian grocery store.

The syrup I made way before the holiday

Red bean paste filling and lotus seed paste filling; each of them is 30 g.

Each piece of dough is 18 g.

Press down the dough and wrap it around the filling.

Roll it into a round ball again.

Press with a mooncake mold, release it and there you have a perfect mooncake ready for the oven.

Place them a couple inches apart from each other in a baking pan lined with silicone matt.

Bake in an oven preheated to 375F/ 191°C for 5 minutes; take them out and brush egg yolk wash on the top very gently; sent them back to the oven and bake for another 15 minutes or until they are gold brown. 

DSC_7901 2 copy.jpg

Let them cool to room temperature and store in an airtight container. 

The taste and flavor would be the best on second and third day.

I love to dress up my homemade snack with these cute little dessert bags.  Are they lovely and pretty? O(∩_∩)O~

Fire-grilled Burgers

Ok, we were kind of disappointed last time when we went to the burger shop in Ann Arbor, which was supposed to be great according to FoodNetwork and Travel Channel.  (see here ) So we decided to make burgers at home the way we like it. 

I made the sesame buns and beef patties from scratch.  It might be easier to just buy them from store, but it would take the fun and pride when you make your own burger, wouldn’t it?

I posted the bread recipe before.  Here it is again.


Ingredients for bread:

300 g bread flour
165 to 180 g whole milk
1 large egg
20 g butter, softened at room temperature and diced
30 g sugar
1 teaspoon yeast
1/8 teaspoon salt
egg wash
white sesame seeds


Directions

Microwave the milk on high for 30 to 45 second.  Stir in yeast and let it sit for 5 to 8 minutes.

In the bread machine’s mixing bowl, add milk with yeast, flour, sugar, salt and egg.  Start “dough” cycle.  My machine will knead for 20 minutes and proof the dough automatically for 60 minutes.  When it finishes kneading, stop it completely.  Add diced butter, and start “dough” cycle all over again.

This time, let the machine do the kneading and proof for you.  All you need to do is to check if the dough is double in size at the end of “dough” cycle.  Sometimes the dough is ready before it ends.


Transfer the dough to a well-dusted wood board.  Punch it down and knead gently just until you eliminate all the big bubbles.  Cover and let it rest for 10 minutes.

Divide the dough into 12 equal parts.  Roll each of them into a round shape ball.  Place them on a baking pan lined up with parchment paper or baking mat, about 1 or two inches apart from each other.

Cover and let them sit at room temperature for another 25 to 35 minutes.

Preheat oven to 400F/204°C.

Brush the dough balls with egg wash and sprinkle white sesame seeds on top.

Bake for 14 to 16 minutes.  You might need to cover them with foil for the last 4 to 6 minutes if the bread brown quickly.

Hot and fresh out the oven!  Aren’t they beautiful?

Now we are ready to make beef patties.

Ingredients:

(The ingredients listed here are enough to make 6 to 8 burgers.  I can freeze the extra patties so that I can simple thaw them next time I make burgers at home.)

2 pounds ground beef (80/20)
2 eggs
1 onion, finely chopped
1/2 cup bread crumbs
freshly ground black pepper
1/2 teaspoon sugar
1 teaspoon paprika
1/2 teaspoon garlic powder
1 teaspoon McCormick grilling seasoning
1 to 2 teaspoons worcestershire sauce
1/2 teaspoons finely chopped fresh rosemary
salt to taste


For 3 burgers

1 to 2 onions, grilled
6 slices of bacon, grilled
cheddar cheese
3 eggs. fried
lettuce or other leafy greens
mayonnaise / ketchup


Directions:

In a large bowl, add beef, eggs, onion, bread crumbs, black pepper, sugar, paprika, garlic powder, grilling seasoning, werstershire sauce, rosemary and salt. 

Mix with hands just until everything is well combined.  Do not over mix.  

Divide into 6 to 8 parts. Round each of them into a big meatball and press them down with your palm.  And with your thumb, make a dent in the center.  It helps to cook the patties evenly. 

Preheat the grill to 450F/232°C.  Brush the grill with oil.  Place the beef patties in the center and grill for 2 minutes. 

2 minutes later

Grill another 2 minutes.  Top them with cheddar cheese.  I prefer thick cut. O(∩_∩)O~

1 or 2 minutes later, the cheese melts beautifully.  Transfer them to a cooler zone on the grill.

Turn the heat to minimum and toast the sesame buns for a couple minutes. 

Ok, finally it is time a grab a plate.  Pick your bread and top it with grilled beef patty with cheese.

Top it with grilled bacon, grilled onion, fried eggs, leafy greens, mayonnaise or ketchup.  

Time to enjoy the burger you work so hard for.  Yum! 

Blimpy Burger & Mighty Good Coffee in Ann Arbor, MI

 中文:安娜堡的BLIMPY BURGER 和 MIGHTY GOOD COFFEE

Although it is only two hours drive away, we don’t go to Ann Arbor as often as other people do.  If we go there, we go there for one clear purpose: food!  

As a college town, Ann Arbor has a wide variety of restaurants to offer.  Among them, there is a burger joint called Krazy Jim’s Blimpy Burger which I always want to try.  It has been featured in FoodNetwork’s Diner, Drive-ins, and Dives, Travel Channel’s Hamburger Paradise 2 and Man VS Food shows.  Last time when we were in town, it was closed for renovation. So I have to try it this time.

It is just a block away from Main Street, not far behind Starbucks. 

Menu on the wall

Ok, here is how to order your food properly…….

Looks like this burger joint has been featured in food magazines too.

I remember this funny cook from TV shows.

This is a open kitchen.  You get to watch how your burger is cooked when waiting in line. 

IMG_8714 2.jpg

What makes the burgers here special is that the never-frozen-beef is freshly grounded in store.  And you can choose between double and quint patties plus grilled items and condiments.  You can have as many as 2,147,483,648 different flavors burgers here, wow!

He ordered triple plus American cheese, grilled onion and bacon.

The beef is juicy and tender.

I ordered double plus American cheese, grilled onion and fried egg.

The egg is a little bit beyond well done.

We shared an order of fried mixed vegetable. It is crunchy and crispy, not bad. 

Burgers are between ok and good.  Not as good as what they say on TV.  When we were eating there, there were only a few people, barely a line up.  We probably will not go back again.

According to the cook, it is all because they moved away from the original spot.  

After lunch, we spent a couple hours in the downtown area, window shopping those cute and interesting stores.  And then it is coffee time. 

I picked Mighty Good Coffee because they have quite a reputation online. 

There isn’t much decoration inside the store, but it still makes you feel quite cozy.

We ordered two cups of cappuccinos. What a perfect ending for a short trip to Ann Arbor!O(∩_∩)O~