Brenham Wildflowers and Blue Bell Ice Cream Store

The most exciting events in spring for us are wildflower touring and crawfish festivals.  We make plans to going to Brenham and Austin to see wildflowers every year.  The plans don’t always get carried out because the wildflowers’ peak time is very short.  Besides, wildflowers are affected by many other factors like temperature and rainfall. 

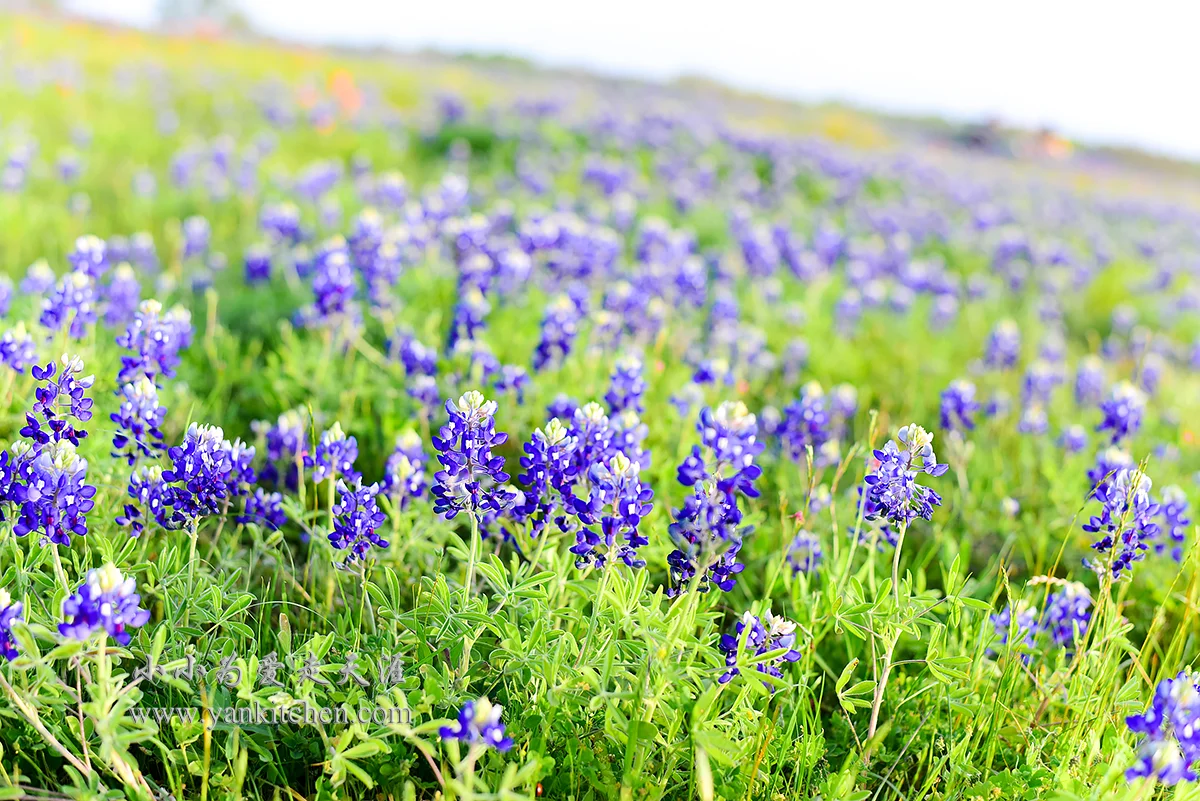
This year, we finally have a perfect wildflower tour to Brenham during bluebonnets peak time.  Hooray

Bluebonnets are literally everywhere!  You can spot them along the highways, country roads, parks, farms…you name it.

The very first stop we make in Brenham is of course the Blue Bell ice cream store.

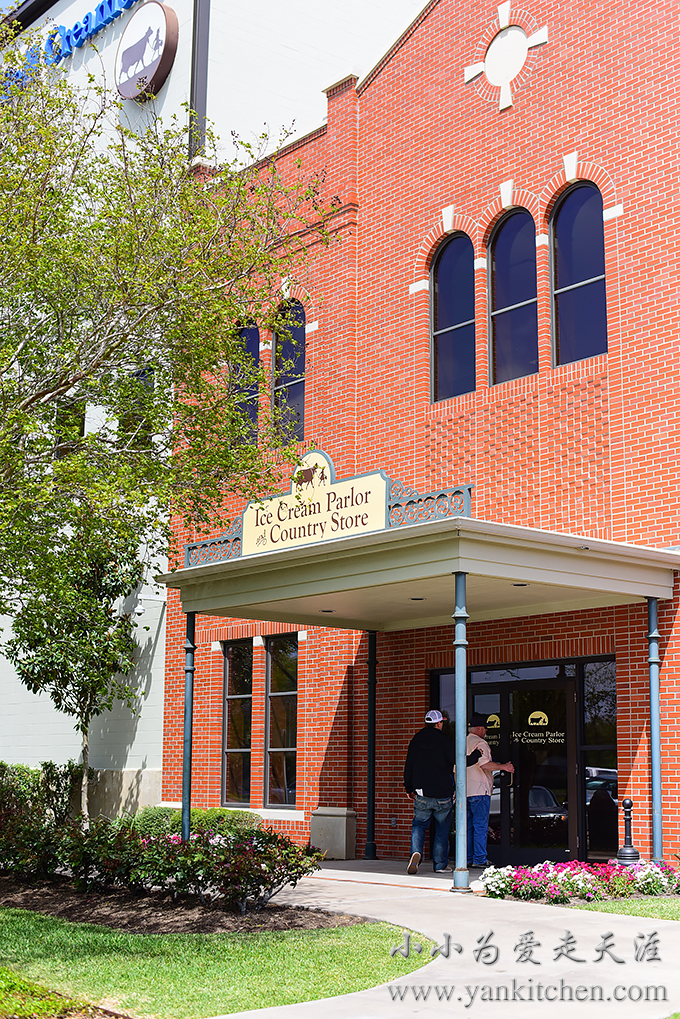
They are not open during weekends anymore.  There are no more factory tours either.  But the ice cream store is still there selling delicious ice cream for a very reasonable price.  

You can still peak through the glass from observation deck on the second floor.  No photos are allowed in that area.  To be honest, you don’t get to see much from observation deck.

A lot of people come here in large groups.  The parking lot is full of cars and buses.

The ice cream store is on the second floor, same as observation deck.

Look at the flavors they produce

There are flavors sold the store

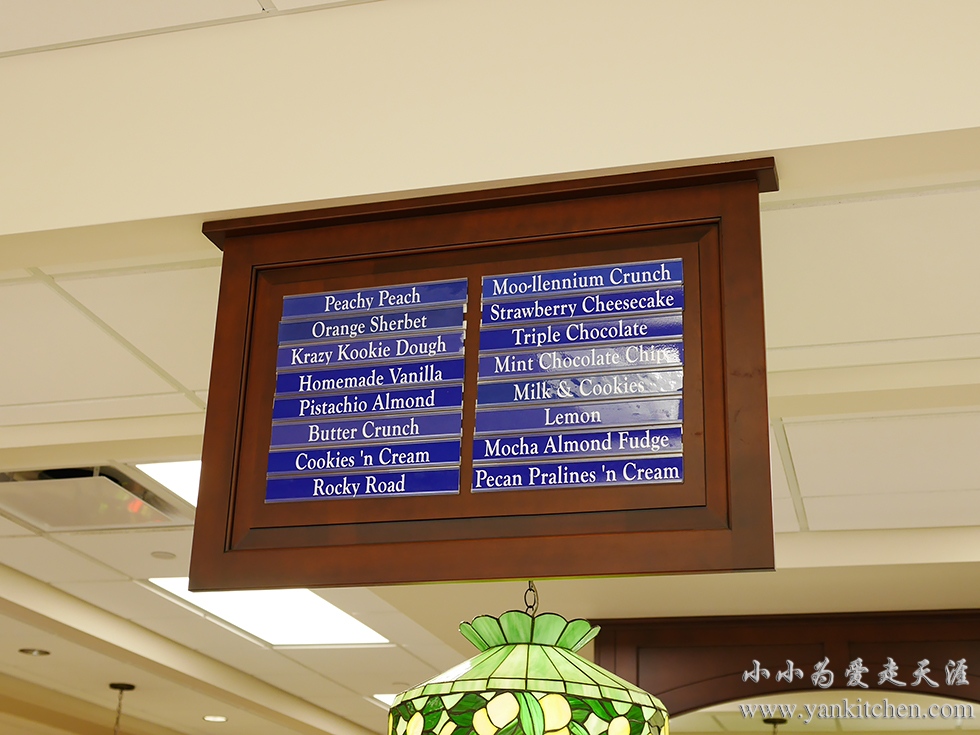
Did I mention the price is very reasonable? O(∩_∩)O~

rocky road  and mocha almond fudge

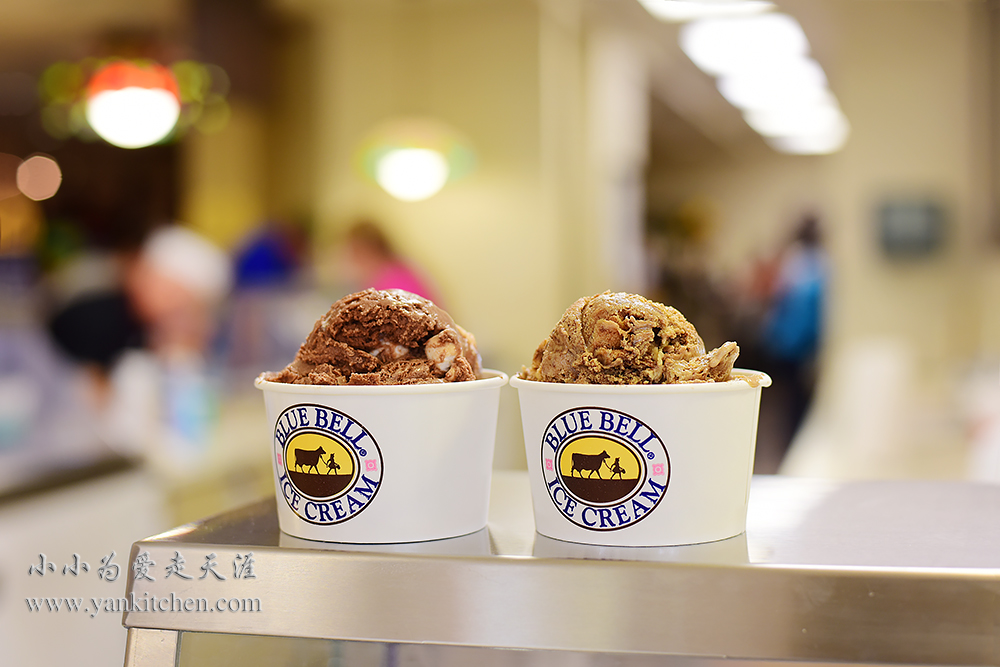
moo-llenium crunch  and strawberry cheesecake

The ice creams here are a bit too sweet for us.  And I wish they could be creamier.

Peachy peach

It is surprisingly good.  There is an intense peach flavor, and very sweet and creamy with large peach pieces.

There is also a visitor center right next to the ice cream store where you can experience blue bell history.

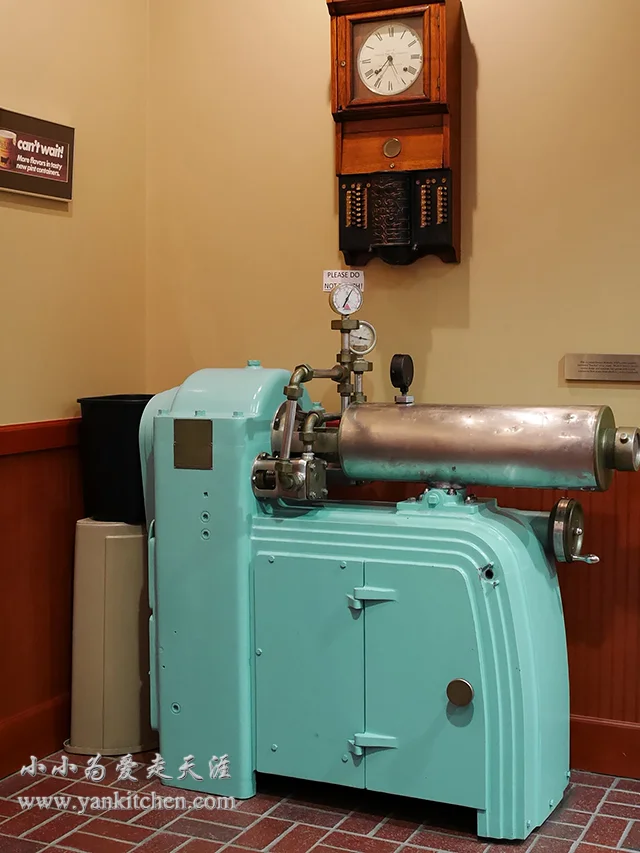
I guess this is the oldest ice cream machine O(∩_∩)O~

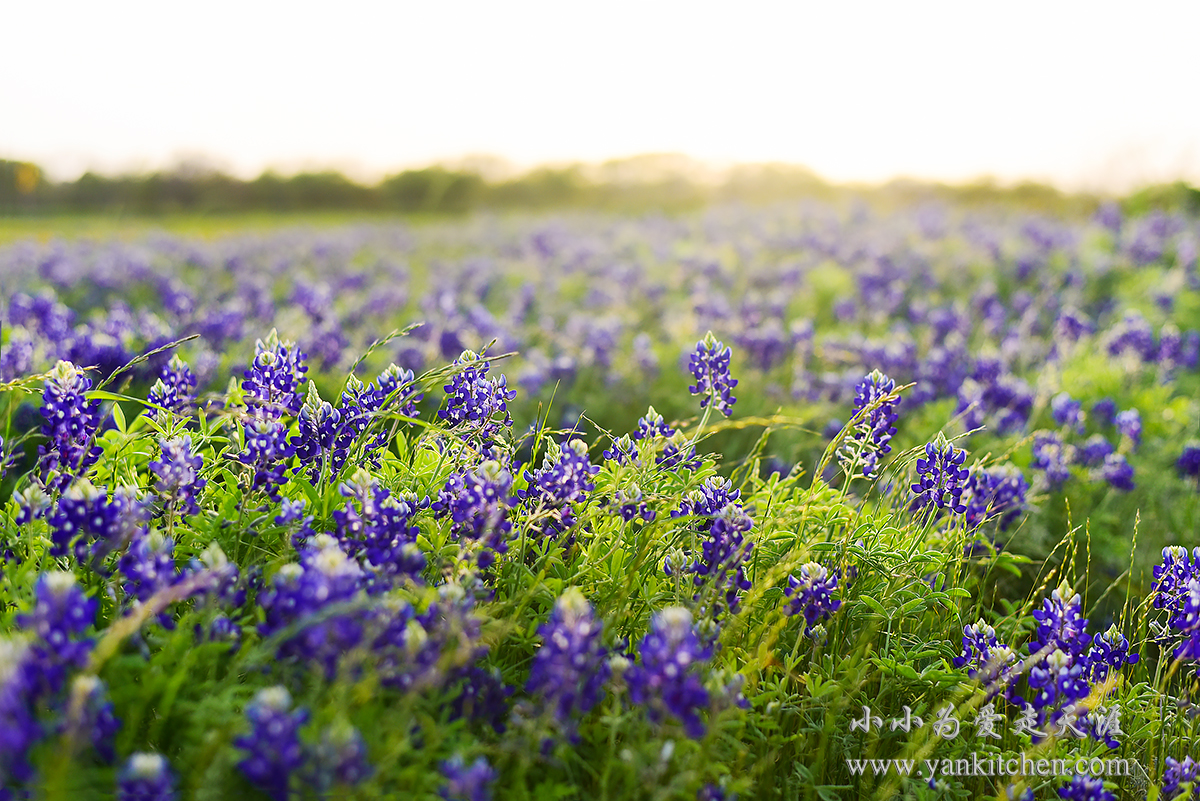
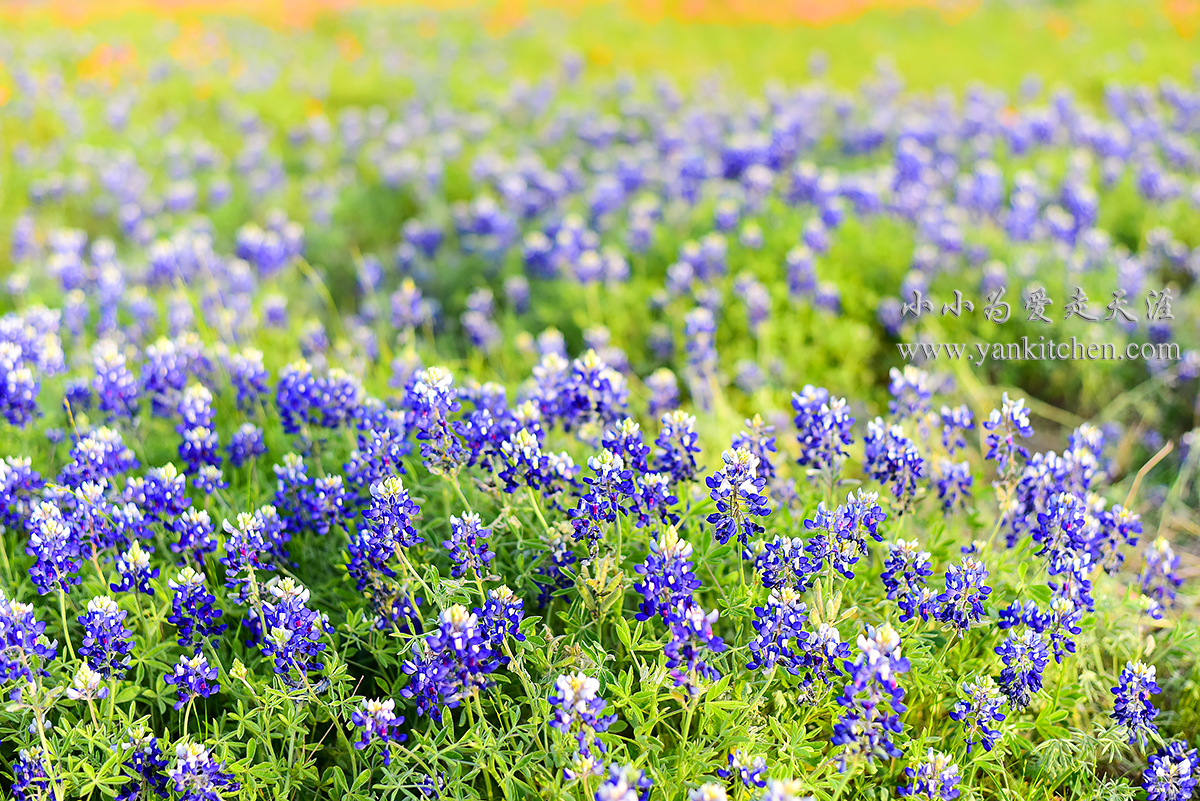
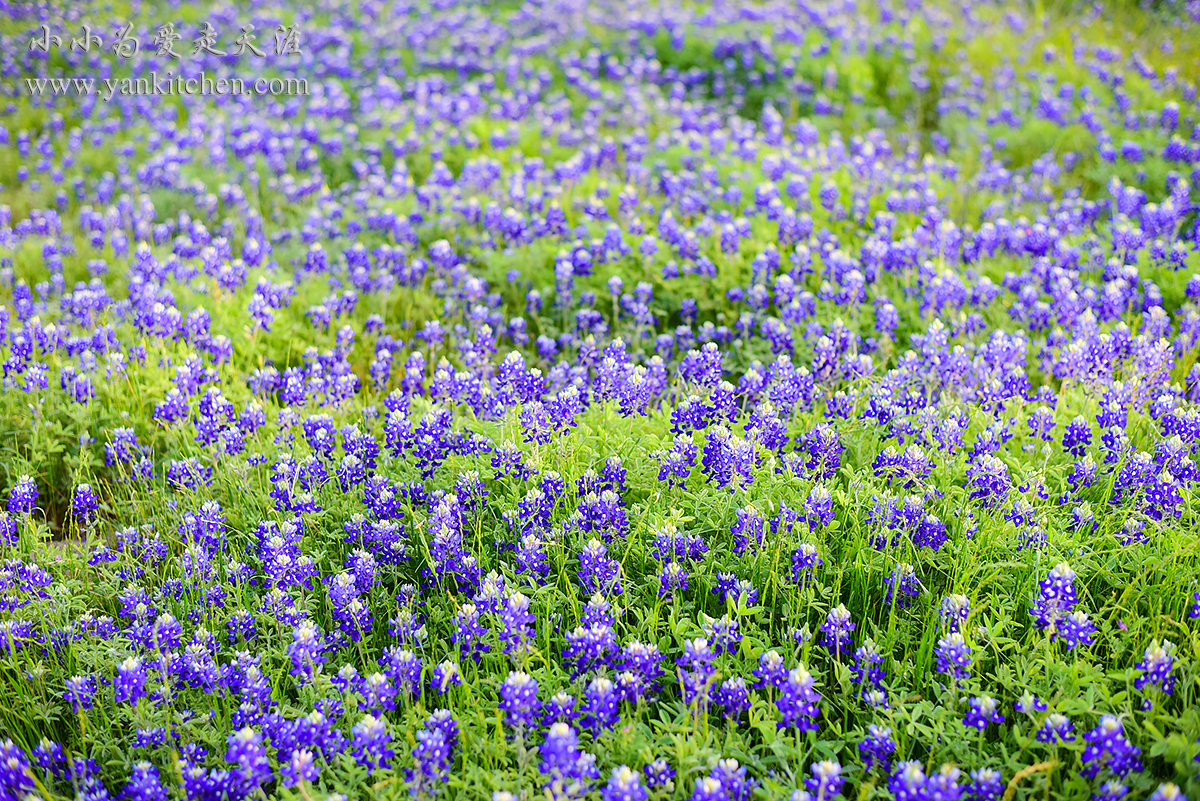
It is peak time for bluebonnets.  You can spot them everywhere.

We drive up north to Independence

There is Antique Rose Emporium right on highway 50.  We stop by every time.

They sell all kinds of roses, plants, bushes and herbs here.

Old Baylor Park

The bluebonnets are not very good here this year.  But it is still a very nice picnic spot.

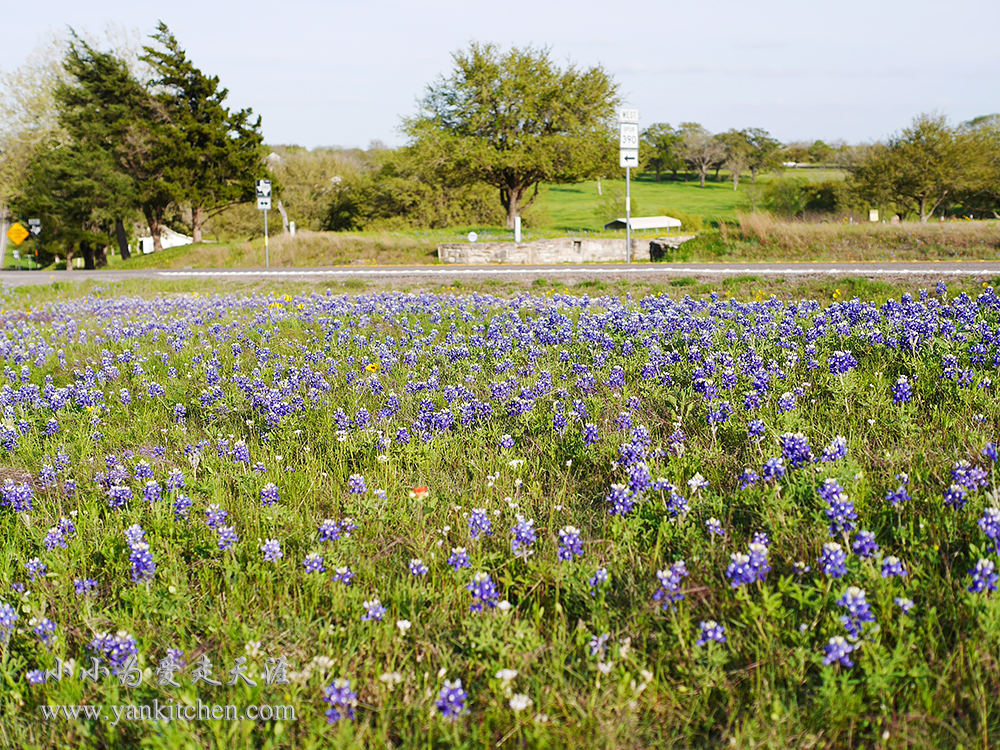
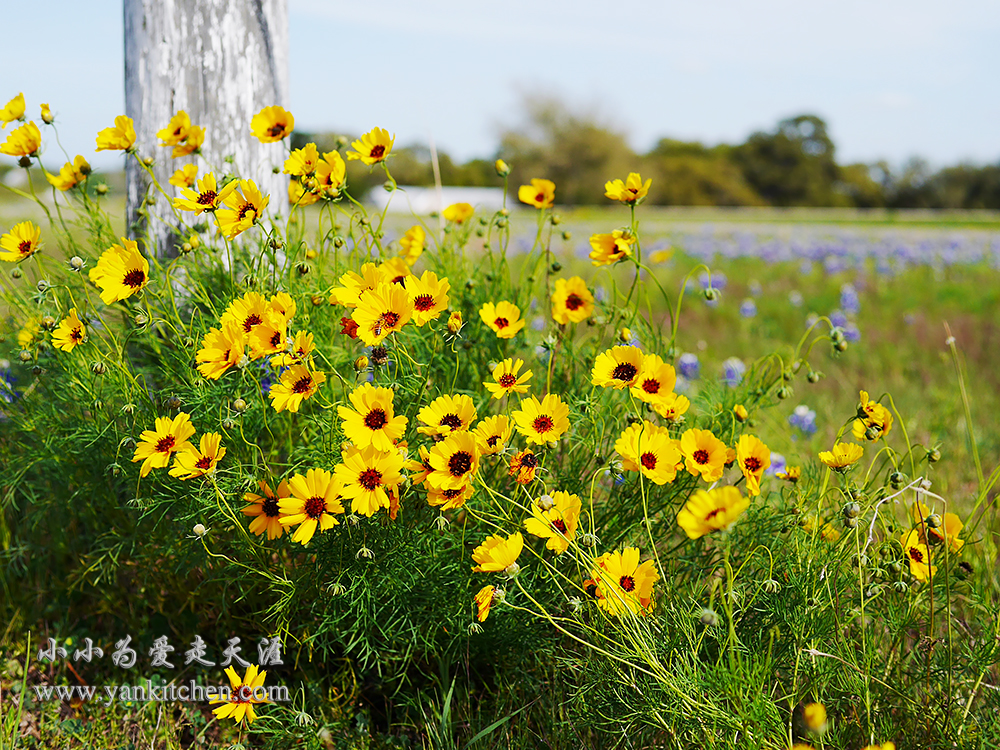
On our way back to Brenham, we come across a very large field of blue bonnets.  I am totally amazed by its beauty and colors.
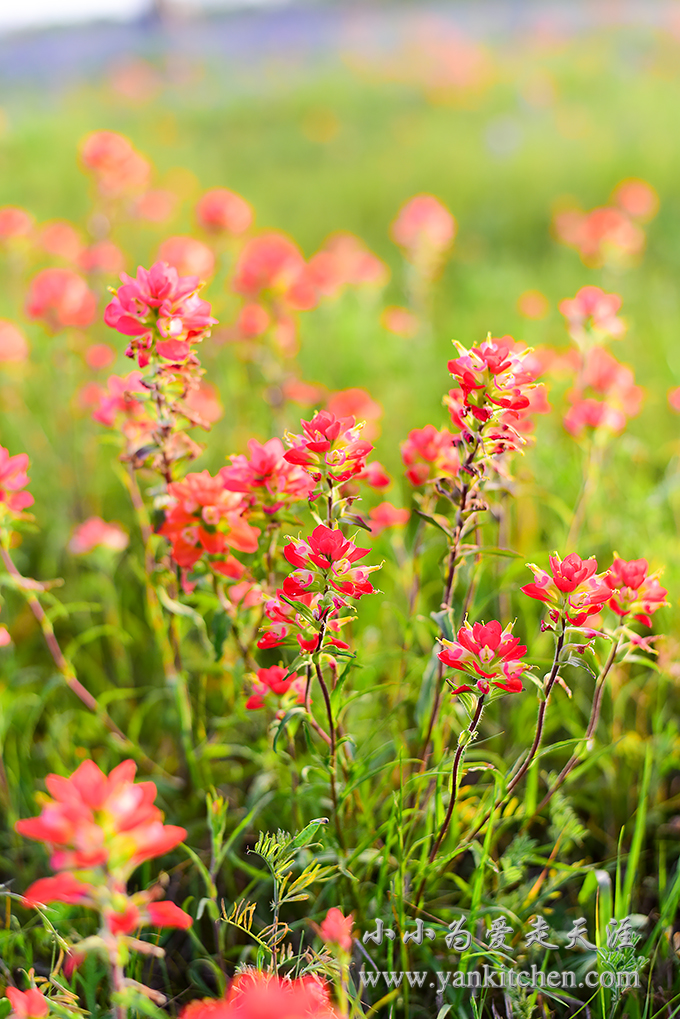
Indian paintbrush

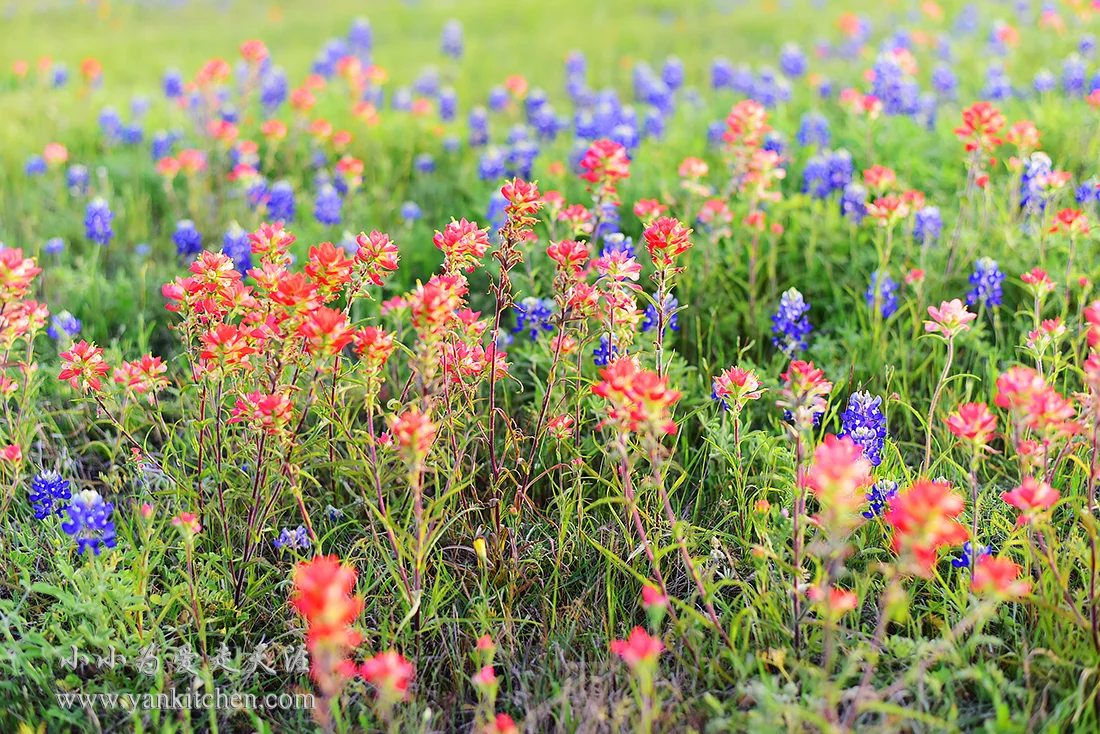
Not sure what these blue/purple white flowers are.  They are also very lovely.

Sun is coming down.  I take a few more photo shots and head back to Houston  O(∩_∩)O~

Stir-fried Pork Belly and Dried Daikon

中文菜谱:

五花肉炒萝卜干

It is a dish I cook over and over again in my kitchen.  It is very simple, quick to make but loaded with tons of great flavors.  Whenever I don’t want to spend a lot of time cooking, I stir fry some pork belly with slightly dried daikon.

Pork belly is perfect for stir fry.  The daikon has been slightly dehydrated before cooking, which produces an extra crunchy texture. 

Ingredients:

1/2 pound pork belly, thinly sliced
1 large daikon (sold in any Asian grocery stores)
a handful dry chili peppers, cut into small pieces
1 teaspoon Sichuan peppercorns
2 gloves of garlic, peeled and minced
1 small piece of ginger root, minced
1 to 2 teaspoons oyster sauce
1 tablespoon rice cooking wine
3 to 4 tablespoons soy sauce
1 teaspoon dark soy sauce
freshly ground black pepper
salt to taste
2 to 3 tablespoons vegetable oil  


Directions:

Clean and peel the daikon.  Cut it into 3 mm thin slices.

Dehydrate daikon slices in a food dehydrator for about 4 hours.  The time needed here shall be adjusted according to daikon slices’ thickness and freshness.  

If you don’t have a food dehydrator, that is ok.  Just leave them in a sunny spot in your backyard or deck for half to a full day.  That shall do too.

Thinly slice the pork belly

Heat a cast iron wok over high heat.  Add oil, and then minced ginger, garlic, Sichuan peppercorns and dry chili peppers.  Sautee the spices in oil for a few seconds.  Add pork belly.

Stir fry until pork belly begins to turn golden brown.  Add black pepper, daikon, rice cooking wine, soy sauce, oyster sauce, dark soy sauce and salt.

Continue to stir fry over high heat for 3 to 4 minutes.

Everything in the wok should be evenly coated with shiny, dark golden sauce.

Remove from heat and serve immediately.

Smashed Shrimp Paste for Hot Pot

中文菜谱:

虾滑和粥底火锅

If you like Asian style hot pot, you will love this smashed shrimp paste.    

Cooked smashed shrimps taste a lot better than regular cooked shrimps.  It carries on the shrimp flavor but with a smoother and slight crunchy texture, which makes eating these tiny shrimp balls so fun.

Ingredients:

1 lb shrimps
1 egg white
1 teaspoon corn starch
1/4 teaspoon ground white pepper
1/4 teaspoon ground ginger
1 to 2 teaspoon rice cooking wine
salt to taste


Directions:

Peel and devein shrimps.  There are peeled and deveined frozen shrimps sold in the store.  However, all these extra factory processing weakens part of shrimp flavor.  I always buy whole shrimps and clean them at home.  That is some extra work, but well worthy in the end.

With a cleaver knife, finely chop the shrimps.

I really mean to finely chop O(∩_∩)O~

Try not to use a food processor here.  The texture would be a lot different.

Add egg white, corn starch, ground ginger, ground white pepper, rice cooking wine and salt to taste.

With a pair chopsticks or a whisk in hand, whisk well clockwise.  The trick is to whisk hard and always along one direction.  Do not whisk clockwise for 1 minute and counterclockwise for the next minute.

I whisk for almost 10 whole minutes.  It is hard work.  The texture of smashed shrimps depends on it.

Spoon the smashed shrimps to a shallow plate.  Smooth the top with the back of spoon. 

Refrigerate for at least 1 hour.

The smashed shrimps can be added to soup, braised, stir fried, deep fried or steamed.  My favorite way to eat it is hot pot.

Hot pot can be as simple as a pot of water, or it can also be as complicated as a pot of slow simmered broth with a lot of spices.  I am using rice porridge here.

Drop by teaspoonfuls into hot pot

Cook until they float and turn into pink color.

Serve hot immediately.  The smashed shrimp paste has been seasoned.  Any additional sauce is not required but always welcomed to add some extra flavors.

Soft Boiled Eggs in Soy Sauce and Rice Wine

中文版菜谱:溏心温泉蛋(米酒版)

If you are a fan of ramen noodles like me, you would be familiar with the soft boiled eggs in soy sauce and know how great they taste. 

Tonkotsu ramen is very hard and time consuming to make from scratch at home.   On the other hand, soft boiled eggs are quite simple and easy.

Making authentic Japanese style soft boiled eggs recipe requires merin, which is similar to rice wine but sweeter.  When you don’t have merin at hand (well, I guess most people in America don’t), you can always substitute with rice wine like I do.  And it works out pretty good too.

Ingredients:

8 fresh eggs
water for boiling eggs plus more for soaking
ice cubes
2/3 cup soy sauce
2/3 cup rice wine
1 1/3 cup water
salt to taste


Directions:

In a medium stainless steel pot, add water and eggs. 

Cook over high heat until water boils.  Turn off heat and cover eggs with lid immediately.  Wait for 3 to 4 minutes.  If you like egg yolks to be less runny, wait for another a couple minutes.

Fill a large bowl with water and ice

Add eggs

Add soy sauce, rice wine, brown sugar, salt and water to a medium pot.  Cook over medium high heat until the mixture boils. 

Remove from heat and allow it to cool down to room temperature.

Peel the eggs and soak them into soy mixture.  Cover with lid or plastic wrap.  Refrigerate overnight.

I use a small bowl to help eggs to completely submerse under soy mixture.

The second day, eggs are ready.

With a sharp knife, cut eggs open in the center

Homemade Noodles in Thick Pork Broth

中文菜谱:

超浓猪筒骨汤面

Since I got stand mixer with pasta roller set and Philips pasta machine, I have been making a lot of noodles.  Homemade noodles from scratch is so much fun that the whole family can enjoy.

A bowl of great noodles depends on its broth, noodles and topping/ seasoning.  For the broth part, I personally love thick pork broth the most.  It is not hard to make at home but it will take hours.  After it is done, you will love it as much as I do. O(∩_∩)O~

Ingredients:

2 packages of pork femur bones (about 5 to 6 pounds; usually sold in meat department in most Asian grocery stores)
1 large piece ginger root, smashed with knife
2 tablespoons rice cooking wine
1/2 teaspoon ground white pepper 
2 to 3 star anises
2 bay leaves
3 to 4 pieces of dried ginger
water for cleaning and stewing
salt to taste


Directions:

Soak pork bones in cold water for an hour.  Change water twice in between

Rinse well under running cold water.

Fill a large cast iron pot with water.  Add pork bones. 

Cook over high heat until water boils.

Continue to cook on high for 5 minutes.  Get the bones out.  Discard the boiled water in the pot and clean pot with running water.

Refill the pot with water.  Cook over high heat again until water boils. 

Add bones, along with rice wine, ginger root, bay leaves, star anises and dried ginger.  Continue to cook over high heat for another 10 to 15 minutes when then water boils again.

Use a spoon to skim off crumbled blood bubbles that come to the top.

Cover with lid.  Reduce the heat to simmer for 5 hours.

I love to simmer, stew and braise with Staub cast iron pots.  The heat and cooking liquid are very evenly circulated and redistributed inside the pot, which is perfect for long hours’ slow cooking.

Here is a pot of thick pork broth.

Discard the spices added early.  Add salt and ground white pepper to taste.

When the broth is stewed, I make noodles.

Ingredients for noodles (serves two):

1 cup bread flour
1/4 cup water
a pinch of salt

In a medium bowl, add flour, water and salt.  Knead with hand until the dough is smooth and elastic.

Cover with plastic wrap.  Allow the dough to rest for 2 hours.

Transfer the dough to a light dusted wooden board.  With a large rolling pin, roll out the dough into 1/4 inch thick.

Feed the flat rolled dough sheet the stand mixer’s pasta roller.  It will further roll out the dough into long flat rectangle sheet.  I always set the thickness to 1 for this purpose.

Repeat the last step several times until the rectangle is very smooth, elastic and slightly shiny.

Adjust the thickness to 3. 

The thickness can be adjusted according to your own personal preference.

Change pasta roller to pasta cutter.  My favorite is the one that cuts sheet into spaghettis.  Feed the dough sheet through pasta cutter.

Noodles are thin and long.  They are firm but not tough; just the way I love. 

Our favorite vegetable to go with noodle is snow pea tips.

Cook the noodle in boiling water for about 45 seconds to 1 minute.

Add thick pork broth, blanched snow pea tips, soft boiled egg, and chili oil.  And then sprinkle with crash toasted peanut and chopped green onions.